How to Use a Hygrometer
So you bought a hygrometer, stuck it on the wall, and now you are staring at a number. Is it right? Probably not.
Learning how to use a hygrometer correctly matters more than most people realize, because the reading itself is useless if the device is uncalibrated, poorly placed, or the wrong type for your situation.
The reality is that humidity affects everything from mold growth to guitar cracks to cigar quality. According to ASHRAE Standard 55, indoor relative humidity should stay between 30% and 60% for human comfort and building health. But your hygrometer will not tell you the truth unless you set it up properly.
Let us walk through exactly what that means.
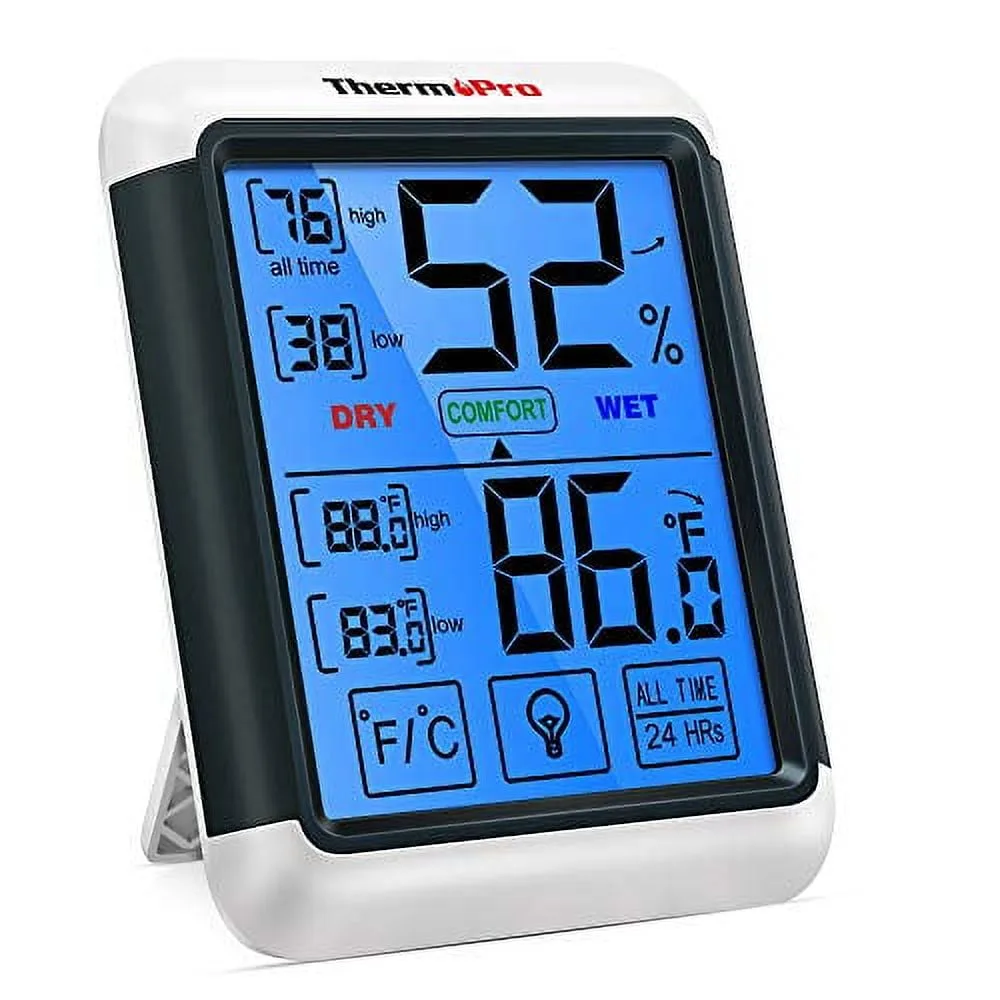
Image source: Bing (Web (fair-use with source credit))
Quick Answer
To use a hygrometer, first identify your type. Place it away from heat and moisture sources. Let it stabilize for 15 to 30 minutes.
Read the relative humidity display. Calibrate it every six months using the salt test. That is the full process in five steps.
Why Your Hygrometer Might Be Lying to You
Out of the box, many hygrometers read off by 5 to 10 percent relative humidity. Factory calibration drifts during shipping, storage, and temperature changes. You would not trust a thermometer that read 40 degrees in a 70-degree room.
Do not trust a hygrometer that has not been verified.
Manufacturer documentation indicates that analog hygrometers drift more often than digital ones. The mechanical spring inside an analog dial stretches and contracts over time. Digital sensors, especially capacitive types, hold their accuracy longer but still need periodic checking.
The problem is that most people never check. They mount the device, glance at the reading, and assume it is correct. That assumption leads to mold in basements, cracked acoustic guitars, and ruined cigars.
A hygrometer that reads 10 percent low might keep your humidor at 80 percent humidity when you think it is at 70. That is a breeding ground for trouble.
The fix is simple. Test your hygrometer before you trust it. Place it correctly.
Recalibrate it on a schedule. That is what this guide covers step by step.
Analog, Digital, or Psychrometer: Identify Your Hygrometer
Before you do anything else, figure out what you are holding. The three main types work differently, and each one needs a different approach.
Analog Hygrometers
Analog hygrometers have a dial face and a metal needle. They use a coiled spring coated in a moisture-sensitive material. As humidity changes, the coil expands or contracts, moving the needle.
These are the cheapest and most common in consumer humidors and home weather stations.
The downside is accuracy. Most analog hygrometers claim ±5 percent, but user feedback and manufacturer specs show that ±10 percent is more realistic out of the box. They also respond slowly, sometimes taking an hour to register a change.
If you own an analog model, you must calibrate it. You will need a small screwdriver to adjust the needle. Without calibration, the dial is just decoration.
Digital Hygrometers
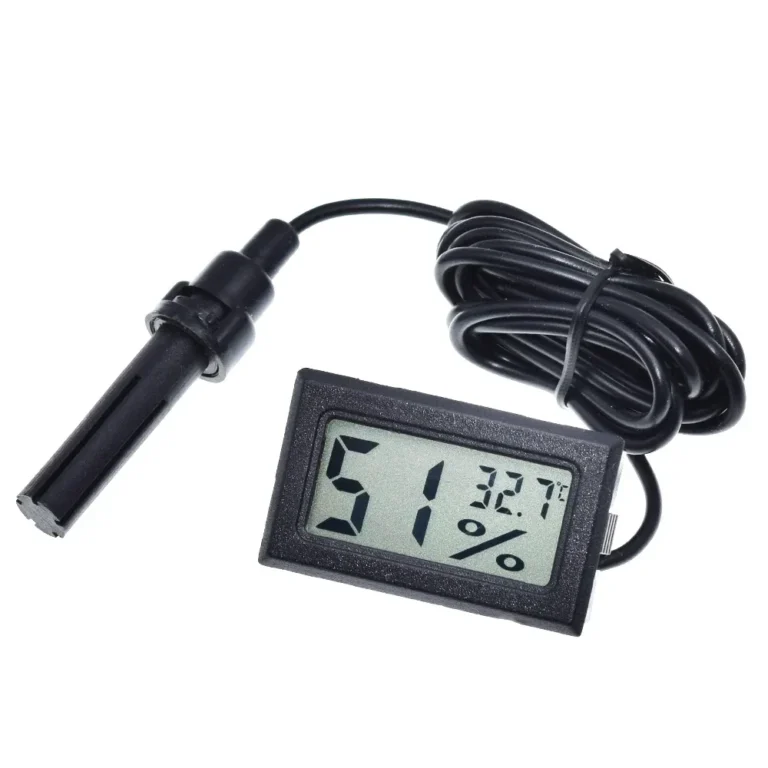
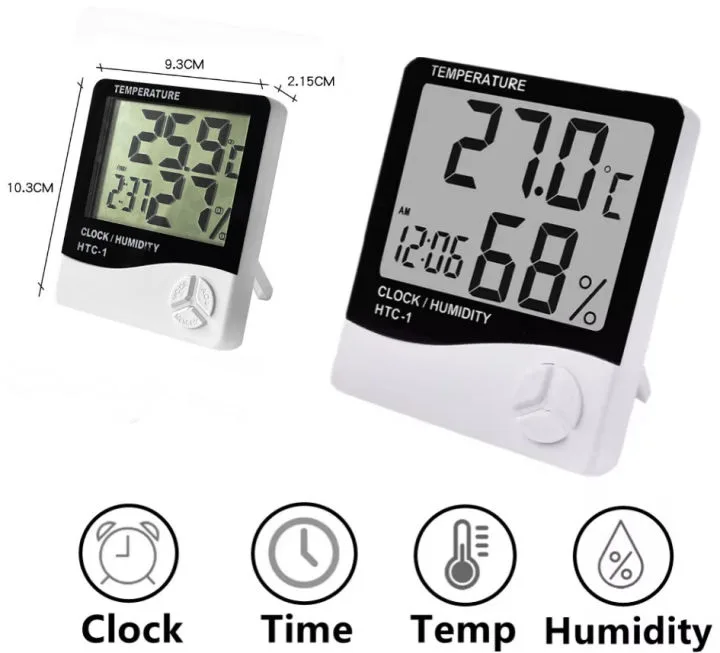
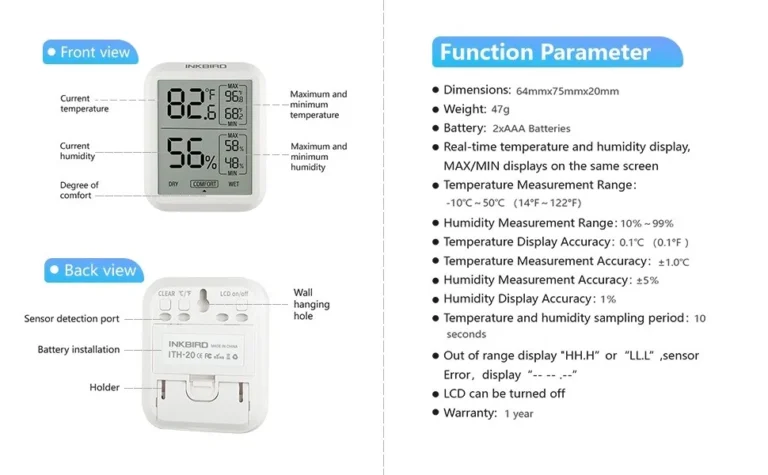
Digital hygrometers use an electronic sensor, usually a capacitive or resistive type, to measure humidity. They display the number on an LCD screen. Some show temperature and dew point as well.
These are generally more accurate than analog models. Most consumer digital hygrometers claim ±2 to ±3 percent. Brands like ThermoPro, Govee, and AcuRite dominate the market.
Digital models also respond faster, often updating within 10 to 30 seconds.
The catch is battery life. A dying battery causes drifting readings, especially in cold environments. Replace batteries every 6 to 12 months, or whenever you see the display dimming or the reading jumping around.
Sling Psychrometers
Sling psychrometers are the professional tool. They have two thermometers, one with a wet wick and one dry. You spin the device in the air for about 30 seconds, then read both temperatures and consult a psychrometric chart to find relative humidity.
These are the most accurate option when used correctly. They do not need batteries and never drift. But they take practice and are overkill for most home users.
HVAC technicians use them for system diagnostics. Cigar enthusiasts and plant owners can stick with a well-calibrated digital hygrometer.
How to Use a Hygrometer: The Step-by-Step Workflow
Once you know your type, the actual process is the same across all three. Follow these steps in order.
Step 1: Prepare the Hygrometer
Remove any protective film from the display or sensor. Install fresh batteries for digital models. For analog models, make sure the needle moves freely.
If it is stuck, gently tap the face. For a sling psychrometer, wet the wick with distilled water until it is saturated but not dripping.
Step 2: Power On and Stabilize
Turn on the digital hygrometer. Place it in the room or space you want to measure. Close the door or lid if you are testing a humidor or vivarium.
Wait 15 to 30 minutes for the sensor to adjust to the environment. Analog models need longer, sometimes up to an hour.
Do not touch the sensor during this time. Body heat and moisture from your hands will throw off the reading.
Step 3: Take the Reading
Read the display or dial at eye level. For digital models, note the relative humidity percentage. Some models also show temperature.
For analog models, read where the needle points. For a sling psychrometer, read the dry bulb temperature, then the wet bulb temperature immediately after slinging.
Step 4: Interpret the Result
Compare your reading to the target range for your use case. A comfortable home is 30 to 50 percent. A cigar humidor is 65 to 72 percent.
A guitar case is 40 to 55 percent. If your reading is outside the target, adjust the environment with a humidifier or dehumidifier, or recalibrate your device.
Where to Place It for Accurate Readings
Placement is the most common mistake people make. Put your hygrometer in the wrong spot, and the reading is useless no matter how well you calibrated it.
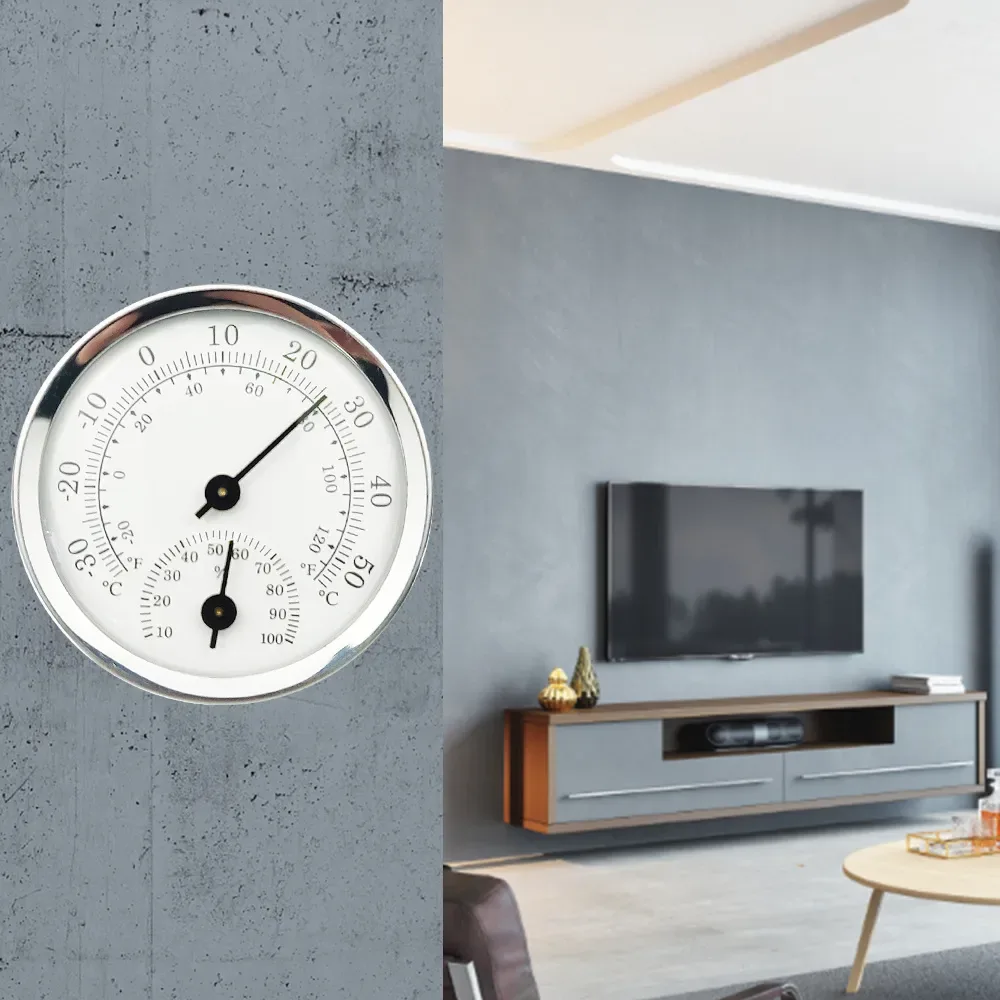
Image source: Bing (Web (fair-use with source credit))
Keep the device away from direct sunlight. Sunlight warms the sensor and produces a falsely low humidity reading. Keep it away from heating vents, air conditioning ducts, windows, and exterior doors.
These spots experience drafts that do not reflect the average room conditions.
Do not place the hygrometer near a humidifier or dehumidifier. That gives you the humidity right next to the machine, not the room as a whole. Also avoid placing it in corners or behind furniture where air does not circulate.
The ideal spot is at eye level on an interior wall, away from any obvious moisture sources. In a humidor, place the hygrometer on the same shelf as your cigars, not on the lid or floor. In a vivarium, mount it at the center of the enclosure, away from the water dish and heat lamp.
For outdoor use, make sure the hygrometer is rated for outdoor conditions. Many consumer models are indoor only and will fail in rain or direct sunlight.
Calibration 101: The Salt Test and Beyond
Calibration is the single most important step. Without it, you cannot trust your hygrometer. The good news is that it is simple and takes about six hours total.
The salt test works because table salt holds a constant relative humidity of 75 percent at 70 degrees Fahrenheit. Sealed in a container with a little water, the air above the salt reaches exactly 75 percent RH. If your hygrometer reads anything else, you know the error.
The Boveda Bag Method
The easiest way to calibrate is with a Boveda One-Step Calibration Kit. It comes with a pre-mixed salt solution sealed in a bag. You place the hygrometer inside, seal the bag, and wait 24 hours.
Then check the reading. If it is not 75 percent, note the difference and adjust your readings accordingly, or use the calibration screw to zero it out.
This method is foolproof but costs about 10 dollars per kit. The kits are reusable for a single calibration cycle.
The Salt Jar Method
The DIY version is just as accurate. You need a clean jar with a tight lid, table salt, and a small amount of distilled water.
First, put a tablespoon of salt in a small cup or bottle cap. Add a few drops of distilled water until the salt is wet but not dissolved. The texture should be like wet sand, not soup.
Place the cup and your hygrometer inside the jar. Seal the lid tightly. Let it sit for 6 to 12 hours at room temperature.
Do not open the jar during this time.
After 6 hours, check the reading through the glass. A properly calibrated hygrometer should read 75 percent. If it reads 70 percent, it is 5 percent low.
If it reads 80 percent, it is 5 percent high. For digital models, note the offset and mentally add or subtract it from future readings. For analog models, use the calibration screw on the back to adjust the needle to 75 percent.
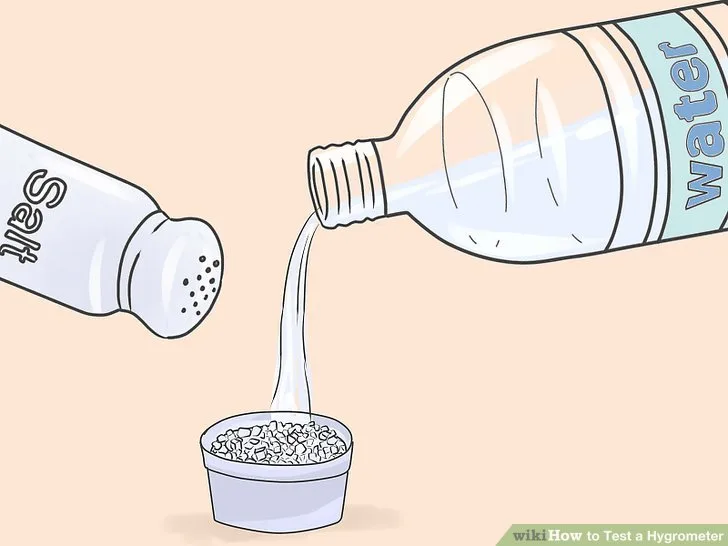
Image source: Bing (Web (fair-use with source credit))
Repeat this test every six months. Hygrometers drift over time, and the salt test catches that drift before it causes problems. According to NIST guidelines for humidity measurement, calibration should be verified regularly to maintain accuracy in critical applications.
Common Mistakes to Avoid
Even after calibration and proper placement, people still make errors that ruin their readings. Here are the ones we see most often.
Checking the reading too soon. Digital hygrometers need 15 to 30 minutes to stabilize. Analog models need up to an hour. If you check after two minutes, you are reading the sensor memory of the last environment, not the current room.
Wait the full time.
Breathing on the sensor. Your breath is warm and humid. Leaning in to read the display can spike the reading by 5 to 10 percent instantly. Hold the device at arm length or read it from a distance.
Ignoring temperature swings. Relative humidity changes with temperature. If your room drops from 70°F to 50°F overnight, the RH reading will rise even if the actual moisture in the air stays the same. Do not panic over a single high reading.
Look at trends over 24 hours instead.
Mounting on an exterior wall. In winter, exterior walls are colder than interior walls. Cold surfaces lower the local temperature and raise the local RH reading. You get a false high reading that does not reflect the room average.
Stick to interior walls.
Forgetting to recalibrate. Hygrometers drift. Set a calendar reminder every six months to run the salt test. If you cannot remember the last time you calibrated, assume the reading is wrong.
What Your Readings Mean: A Practical Decision Guide
Your hygrometer gives you a number. Now you need to decide what to do with it. Here is the if/then logic for common scenarios.
Humidity Is Too High
If your reading stays above 60 percent for more than a few hours, you have a moisture problem. Mold and dust mites thrive above 60 percent. Wood swells and warps.
Cigars can develop mold or bloom.
Action: If the reading is above 60 percent, run a dehumidifier in the room. If it is above 70 percent, check for leaks, poor ventilation, or a humidifier running too high. In a humidor, remove any cigars that show white fuzz.
Reduce the humidification source or let the box air out.
Humidity Is Too Low
If your reading stays below 30 percent, the air is too dry. This causes cracked wood, static electricity, dry skin, and respiratory irritation. Musical instruments can develop structural cracks.
Action: If the reading is below 30 percent, run a humidifier. Aim for 40 to 50 percent. In a guitar case, use a case humidifier.
In a humidor, add distilled water to the humidification device. Check the seal on the lid. A leaky seal lets moisture escape.
Reading Seems Inconsistent
If the number jumps around wildly, the sensor may be faulty or the battery may be dying. Replace the battery first. If the jumping continues, run the salt test.
A sensor that cannot hold a steady reading during calibration is defective and should be replaced.
If the reading changes slowly but you expect a fast change, that is normal for analog models. Digital models respond faster. If your digital model is sluggish, compare it to a second hygrometer or run the salt test to verify.
Maintenance and Long-Term Care
A hygrometer lasts years if you take care of it. The maintenance is minimal but specific to the type.
Replace batteries annually. Digital hygrometers draw very little power, but batteries leak over time. Set a reminder to swap them every January. If you see the display dimming, replace them sooner.
Clean the sensor gently. Dust and grime can block the sensor on digital models. Use a soft brush or canned air. Never use water or cleaning fluids on a digital sensor.
For analog models, wipe the exterior with a dry cloth. Do not open the case.
Store hygrometers properly. If you are not using a hygrometer for months, remove the battery and store it in a dry place at room temperature. Extreme heat or cold can damage the sensor.
Check the calibration annually. The salt test takes six hours and costs nothing. Do it once a year at minimum. For critical applications like cigar humidors or vivariums, do it every six months.
Analog models need extra care. The mechanical spring can stick if the hygrometer is jarred or dropped. If the needle does not move, try a gentle tap. If that does not free it, the device is likely damaged and should be replaced.
Frequently Asked Questions
How often should I calibrate my hygrometer?
Calibrate every six months for critical uses like cigar humidors or vivariums. For general home monitoring, once a year is enough. Set a calendar reminder.
The salt test takes minimal effort, and skipping it means you cannot trust your readings.
Can I use table salt for the calibration test?
Yes. Plain table salt works perfectly. Do not use iodized salt, sea salt, or kosher salt.
The additive in iodized salt can alter the humidity level. Use standard non-iodized table salt and distilled water for the most reliable results.
Why does my hygrometer read differently in different rooms?
Humidity varies by room. Bathrooms and kitchens are naturally more humid. Basements tend to be damp.
Bedrooms are usually drier. That is normal. What matters is that each reading is accurate for its location.
Calibrate each hygrometer separately.
Do digital hygrometers need calibration if they are brand new?
Yes. Digital hygrometers drift during shipping and storage. Manufacturer specs indicate that even new units can be off by 2 to 5 percent.
Run the salt test before you trust the reading. Calibration is not optional, even for a brand new device.
Can I leave my hygrometer in the jar during the salt test?
No. The salt and water mixture should stay in a separate cup inside the jar. Placing the hygrometer directly on wet salt can damage the sensor.
Keep the salt in a small cap or dish. Let the air inside the jar do the work.
What is the ideal humidity for my home year-round?
According to ASHRAE Standard 55, indoor relative humidity should stay between 30 and 60 percent. In winter, aim for 30 to 40 percent to avoid condensation on windows. In summer, 40 to 50 percent is comfortable and prevents mold growth.