Keystone Dehumidifier Not Removing Humidity
Your Keystone dehumidifier hums, the fan spins, you see the little compressor light come on, but after a full day the bucket is still bone dry. That’s the “Keystone dehumidifier not removing humidity” complaint that shows up in forums and product reviews more than any other. It’s maddening because the unit looks alive.
But here’s the thing: in most cases the hardware isn’t dead. The problem is usually one of four specific things: a frozen coil, a blocked airflow path, a stuck float switch, or a room that’s too cold. Manufacturer specs show these units need ambient temperatures above 41°F to work properly.
Let’s run through a simple decision tree so you can find and fix the real issue today.
Quick Answer
If your Keystone runs but collects no water, first check the air filter and room temperature. Frozen coils or a stuck float switch are the next most likely culprits. Turn the unit off, let it thaw 24 hours, clean the filter, and test the float.
If that doesn’t work, inspect the humidity sensor and the continuous drain hose.
Image source: Bing (Web (fair-use with source credit))
Why Your Keystone Dehumidifier Runs But the Bucket Stays Empty
The trick is to stop assuming the unit is broken and start looking at what actually prevents water from reaching the bucket. There are only five root causes, and they all produce different symptoms.
- Frozen evaporator coils. Ice builds up and blocks airflow, so the fan runs but moisture can’t condense. The unit may sound normal or be very quiet.
- Clogged air filter. Restricted airflow reduces evaporation and can trigger frost. Many people forget to clean the washable mesh every two weeks.
- Stuck float switch. The little plastic puck inside the bucket gets jammed, telling the control board the bucket is full when it isn’t. The unit shuts off prematurely.
- Faulty humidity sensor. It reads the room as drier than it really is, so the compressor never kicks on.
- Low room temperature. Below 65°F, a standard compressor dehumidifier struggles; below 41°F, the defrost cycle kicks in and the unit does nothing.
Each of those has a simple diagnostic step. That’s what the next section covers.
Follow This Decision Tree to Find the Real Problem
Start with the universal check, then follow the branch that matches what your unit is actually doing.
Quick Check: Filter, Temperature, and Airflow
Pull out the washable filter. Hold it up to a light. Can you see through it?
If not, wash it with warm water and mild soap, dry it completely, and reinstall. While you’re at it, use a separate thermometer to measure the room temperature. If it’s below 65°F, move the dehumidifier to a warmer space or accept that it will run slowly.
If the filter is clean and the room is warm, move to the branches.
Branch 1: No Air Coming Out
You hear the compressor humming but put your hand over the top grille and feel nothing. The most common cause is a frozen coil.
Image source: Bing (Web (fair-use with source credit))
Turn the unit off completely. Leave it unplugged for at least 12 to 24 hours with the bucket out and the door open so the ice melts away from the coils. Once it’s dry, clean the filter and restart.
If the unit blows air again but the problem returns within a few days, you likely have a low-temperature issue or a failing defrost sensor (see the thawing section).
Branch 2: Air Blowing But Compressor Not Running
The fan runs strong but you don’t hear the compressor click on after a few minutes. The unit is just circulating room air. This points to either a bad compressor start capacitor, a tripped internal thermal overload, or a humidity sensor that’s telling the control board the room is already dry enough.
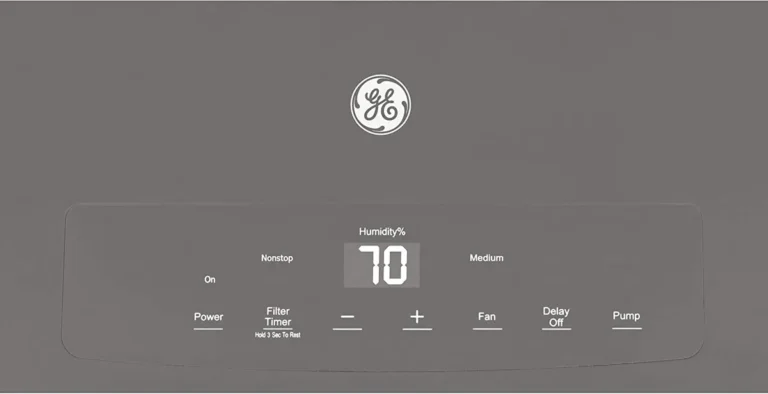
Check the dial or digital setpoint. Is it set to a lower number than the room’s actual humidity? Crank it to 30% or the “Continuous” mode.
If the compressor still doesn’t kick on after five minutes, unplug the unit for 30 seconds and plug it back in. No change? You may need a multimeter to test the compressor terminals, but that’s a warranty or service call.
Branch 3: Compressor Runs, Coils Cold but No Water
Put your hand near the back of the unit after 20 minutes of running. Should feel cool. But the bucket stays dry.
The first suspect here is the continuous drain option. If you’re using gravity drain, make sure the hose isn’t kinked, clogged, or running uphill. Water will find the path of least resistance, and if the hose is blocked, the bucket fills too slowly or spills inside the unit.
If you aren’t using a hose, check the bucket alignment. The bucket must sit perfectly flat to press the float switch down. Wiggle it.
If the float is stuck in the “up” position, the unit thinks the bucket is full and stops collecting.
Branch 4: Bucket Full Light Stays On Even After Emptying
This is the most common “false alarm”. The float switch inside the bucket cavity gets stuck on a piece of debris or just doesn’t drop back down.
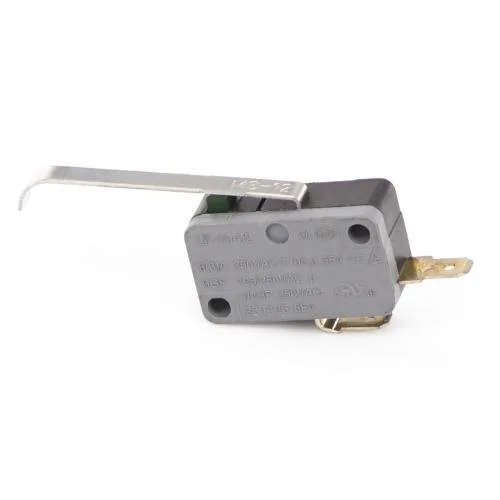
Image source: Bing (Web (fair-use with source credit))
Carefully reach into the bucket well (front or top depending on your model) and push the little plastic float down manually. If the light goes out and the unit starts collecting, you found the issue. Clean the bucket cavity with a damp cloth every few months to keep the float moving freely.
If the light stays on even after pushing the float, the switch itself may be faulty.
How to Safely Thaw Frozen Coils (And Stop It from Happening Again)
If you discovered ice on the coils during Branch 1, don’t just scrape it off. You can puncture the tubing. Unplug the unit, remove the bucket, and pull the filter.
Prop the front grille open with a rolled towel. Let the ice melt naturally for 12 to 24 hours. Place a shallow pan underneath to catch drips.
Once it’s completely dry, restart. To keep coils from freezing again, run the unit in a room that stays above 65°F. If your basement is colder, consider switching to a dehumidifier rated for low-temperature operation (Keystone models are not typically built for that).
Also, clean the filter more often. A dirty filter restricts airflow, which makes the coils colder faster.
Testing the Humidity Sensor and Control Board Like a Pro
The humidity sensor (or humidistat) on a Keystone is usually a small thermistor mounted behind the front grille. If it fails or drifts out of calibration, the control board may never tell the compressor to start.
To test it without a multimeter, try this: place a separate digital hygrometer next to the dehumidifier’s intake. Run the unit in a room that’s clearly humid (70%+). Set the dial to 30% or “Continuous.” If the compressor still doesn’t run but the external hygrometer reads 70%, the sensor is likely bad.
If you have a multimeter, look up the sensor resistance at room temperature in your model’s service manual (usually around 10k ohms). A reading far off that suggests replacement. Replacement sensors cost under $15 and swap out with a simple clip.
For control board issues, look for burned traces or bulging capacitors. That’s often a warranty job.
Six Common Mistakes That Waste Time and Money
- Running the unit in a room below 65°F. The compressor works but the efficiency drops, and the defrost cycle kicks in too often, making it seem broken.
- Forgetting to clean the filter for months. A clogged filter is the number one cause of reduced water removal. Wash it every two weeks in high-usage seasons.
- Blocking the intake or exhaust. The unit needs at least six inches of clearance on all sides. Shoving it against a wall kills airflow.
- Using an extension cord. Keystone recommends plugging directly into a grounded outlet. Extension cords cause voltage drops that can confuse the control board.
- Assuming the continuous drain hose is set up correctly. The hose must go downhill with a steady slope. A low spot collects water and creates an air lock.
- Ignoring the bucket alignment. Even a slightly tilted bucket can prevent the float from dropping, tricking the unit into thinking it’s full.
Avoid those, and you’ll fix most “no water” issues without spending a dime.
When to Replace Your Keystone vs. Call for Warranty Service
Not every “no water” issue is worth a repair bill. If you’ve already run through all the branches and the unit still doesn’t collect, you need to make a call.
Call warranty if your unit is less than 12 months old. Keystone covers parts and labor for the first year. The sealed system (compressor, coils, refrigerant) carries a five-year warranty. If the compressor hums but won’t start, or the coils leak refrigerant, that’s a free repair.
Contact Keystone customer service with your model number and proof of purchase.
Replace the unit if it’s more than three years old and the compressor has failed. Compressor replacement parts cost around $150 to $200, plus labor. A new 50-pint Keystone dehumidifier runs about $180 to $250. From our research, the math doesn’t justify the repair.
Same logic applies if the control board is fried. If you decide to replace it, check out our guide on the best dehumidifiers for basements for current options.
Replace the humidity sensor or float switch yourself if you’re handy. Those parts cost under $20 each and swap out in ten minutes. You can find them on Keystone’s official parts site or through appliance part retailers. No soldering required.
If the unit is older but otherwise working, spending $15 on a sensor is a no-brainer.
When to walk away completely. If the unit has visible rust inside, a cracked bucket, or a refrigerant leak (look for oily residue near the coils), it’s time to recycle it. Those problems almost always mean the unit is beyond economical repair. Find a local appliance recycler that handles R-410A refrigerant properly.
Frequently Asked Questions
How do I reset my Keystone dehumidifier?
Unplug the unit from the wall outlet. Wait five full minutes. Plug it back in and set the humidity to 30% or “Continuous.” This clears most control board glitches and resets the defrost timer.
Why is my Keystone dehumidifier blowing cold air but not collecting water?
That means the evaporator coils are freezing up. Turn the unit off and let it thaw completely for 12 to 24 hours. Clean the filter before restarting.
If it freezes again quickly, the defrost sensor may need replacement.
Can I run my Keystone dehumidifier in a cold basement?
Yes, but efficiency drops below 65°F. At temperatures under 41°F, the defrost cycle runs constantly and the unit collects almost nothing. Consider a low-temperature model or move the unit to a warmer room.
What does the error code E4 mean on a Keystone dehumidifier?
E4 typically indicates a defrost sensor failure or a frozen coil condition. Unplug the unit for 24 hours to thaw. If the code returns after restart, the defrost thermistor is faulty and needs replacement (part cost under $10).
How often should I clean the filter on my Keystone dehumidifier?
Clean the washable filter every two weeks during heavy use (spring and summer). In drier months, once a month is fine. A dirty filter is the top cause of reduced water removal and frozen coils.
Does the continuous drain work on a Keystone dehumidifier?
Yes, but only if the drain hose runs downhill with no kinks or low spots. The hose must attach to the threaded drain port on the back. Gravity requires a steady slope all the way to the drain.
If the bucket still fills, you likely have an air lock in the hose.