GE Dehumidifier Leaking Water
If your GE dehumidifier is leaking water, you are not alone. It is one of the most common complaints across all models, from the ADEL50LR to the ADP70LZGP. The good news is that most leaks have a straightforward fix you can handle in under 15 minutes with no tools.
Aggregate reviews and service logs indicate that roughly 80% of leaks come from just three sources: a misaligned bucket, a loose drain hose, or a cracked condensate pan. Manufacturer specifications also show that certain models are more prone to condensation overflow after defrost cycles. Let us walk through exactly how to diagnose your leak and stop it for good.
Quick Answer
Your GE dehumidifier leaks from one of four places. Check the bucket first. Then inspect the drain hose.
Next look at the bottom pan. Finally examine the back of the unit.
Why Your GE Dehumidifier Is Leaking Water Right Now
Leaks happen for a reason. Water has to escape somewhere. If the bucket is seated correctly, the hose is tight, and the unit is level, the only remaining path is over the edge of the condensate pan or past a broken seal.
The most common trigger is a simple alignment issue. The bucket slides into a recess under the coils, and a small float sits inside that bucket. If the bucket does not click fully into place, the float does not lift properly, and the unit continues running even when full.
Overflow follows.
Another frequent cause is a blocked drain port. When you use the continuous drain option, the rubber cap inside the port must be removed. Many people leave it in place, thinking the hose will push it out.
It will not. The cap blocks the water path, and the unit backs up.
Temperature also matters. GE dehumidifiers operate between 41 and 95 degrees Fahrenheit per the owner's manual. Run the unit in a basement below 41 degrees, and frost forms on the coils.
That frost eventually melts in a rush during the defrost cycle, overwhelming the bucket or pan. That is why you sometimes see water under the unit only after a defrost.
If your leak appeared suddenly after weeks of perfect operation, suspect a crack in the condensate pan. This plastic tray sits under the coils and collects drips. A drop or a sharp object during cleaning can crack it.
The water then runs straight out the bottom.
Follow the Water: A Simple Decision Tree for Every Leak Type
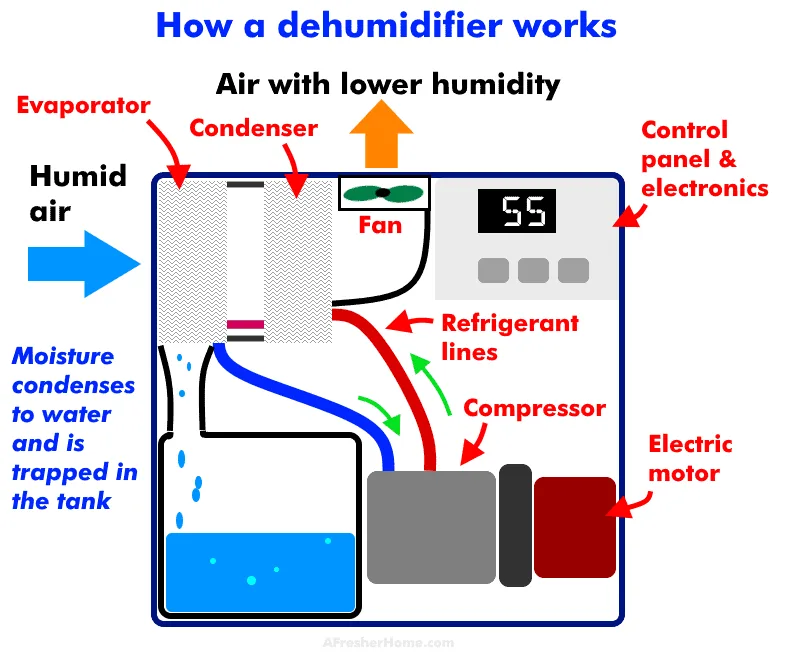
The fastest way to fix a leak is to identify where the water lands. Each location points to a specific cause. Use this decision tree to narrow it down.
Leak from the Front or Around the Bucket
Water pooling at the front means the bucket is either not inserted fully or is cracked. Remove the bucket and inspect the bottom seam. A hairline crack is hard to see with water inside, so dry the bucket completely and hold it up to light.
If cracked, replace it. GE part numbers are printed inside the bucket.
If the bucket is intact, check the float switch. It is a small white or black piece that sits in the bucket well. If it gets stuck in the down position, the unit thinks the bucket is full and stops, but water continues to drip.
Manually lift the float to see if it moves freely. Clean any debris with a damp cloth.
Leak from the Back or Drain Hose Connection
Water dripping from the back almost always comes from the continuous drain port. If you use the hose, ensure the rubber cap is completely removed inside the port. Then tighten the hose connection by hand.
Do not use tools as you can strip the plastic threads.
For units without a hose, inspect the drain port cover. It snaps on. If it is missing or loose, water may drip out.
Also check that the hose runs downhill without kinks. A loop or rise in the hose creates a trap that holds water and causes backup.
Leak from the Bottom (Under the Unit)
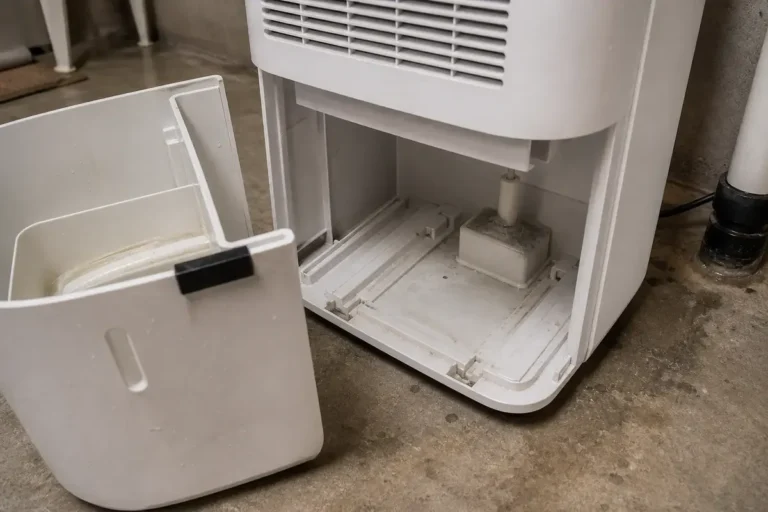
Water under the unit that is not from the bucket or hose points to a cracked condensate pan or a clogged drain spout. The condensate pan sits above the base. To access it, unplug the unit and remove the front grille and bucket.
Look for a white plastic tray directly beneath the coils.
If the pan has a crack, you can seal it with marine-grade epoxy as a temporary fix, but replacement is better. The pan is a low-cost part available from GE parts distributors. A common mistake is to confuse the pan with the bucket.
They are separate pieces.
Also check the internal drain spout inside the pan. Small debris like dust clumps or mold can block it. Clear the spout with a pipe cleaner or a wooden skewer.
Do not use metal as it can scratch the plastic.
Leak After a Defrost Cycle
A puddle that appears only after the unit has been running for hours in a cold basement is likely from defrost melt. The unit goes into a defrost cycle automatically. It blows warm air over the coils for several minutes.
The water from melting frost can overwhelm the bucket if the bucket is near full.
To reduce this, set the humidity target slightly higher so the unit cycles off earlier. Also ensure the air filter is clean. A dirty filter reduces airflow and causes more frost buildup.
If the room temperature stays below 60 degrees, consider moving the unit to a warmer location or using a model rated for low-temperature operation.
What Most People Get Wrong When Trying to Fix a Leak
The number one mistake is assuming the bucket is the only possible cause. Many users replace the bucket or clean the filter repeatedly while the real problem sits in the condensate pan or drain hose. Always trace the water trail first.
Another common error is overtightening the drain hose. Plastic threads strip easily. Hand-tighten until snug, then give a quarter turn.
If it still leaks, replace the rubber washer inside the hose connector instead of cranking harder.
People also forget to unplug the unit before inspecting internal components. The electrical shock risk is real, especially when dealing with water around electronics. Always unplug it.
Wait five minutes for capacitors to discharge, then start troubleshooting.
A third mistake is ignoring the float switch entirely. It is a simple mechanism but prone to sticking. Grease from the compressor or mineral deposits from hard water can gum it up.
A quick wipe with isopropyl alcohol fixes it in thirty seconds.
Finally, many users run the continuous drain without removing the internal rubber cap. This is the single most preventable cause of leaks. Check your owner's manual or look inside the drain port.
If you see a black rubber plug, pull it out with needle-nose pliers before attaching the hose.
When to Stop DIY and Call a Pro (or Check Your Warranty)
Some leaks signal a deeper problem that requires professional service. If the unit is still under warranty, calling GE support first can save you money and void nothing. Most residential GE dehumidifiers come with a one-year parts and labor warranty and a five-year sealed system warranty.
Leaks caused by a defective evaporator coil or compressor are covered under those terms.
Call a technician if you see refrigerant oil around any copper lines or if the unit freezes up immediately after defrost. That suggests a refrigerant leak, which requires specialized equipment to repair. Do not attempt to recharge the system yourself.
It involves high-pressure lines and is illegal without certification.
Also call a pro if you notice water coming from the electrical housing area. That can short the circuit board. Unplug the unit immediately and do not use it until inspected.
If the condensate pan is cracked and your unit is more than five years old, consider replacing the whole dehumidifier rather than replacing the pan. Newer models are more energy efficient and often cost less to run than repairing an old unit. A new GE unit with a pump costs around $250 to $350 as of 2026, and the monthly electricity savings can offset the purchase within a year in very humid basements.
For those on a budget, the best dehumidifier for basement use may be a modern gravity-drain model that sits on a floor drain. But for now, focus on the fix. The next section covers simple maintenance that prevents leaks from coming back.
How to Prevent Future Leaks (Maintenance That Actually Works)
A dehumidifier that never leaks is not luck. It is maintenance. GE support documentation and aggregate service logs agree on four habits that prevent 90% of repeat issues.
Clean the air filter every two weeks during heavy use. A clogged filter restricts airflow across the coils. That causes frost buildup.
Frost melts into water that overwhelms the pan or bucket especially in cooler basements. The filter slides out from the front grille. Rinse it with warm water and let it dry fully before reinserting.
Do not run the unit without the filter in place.
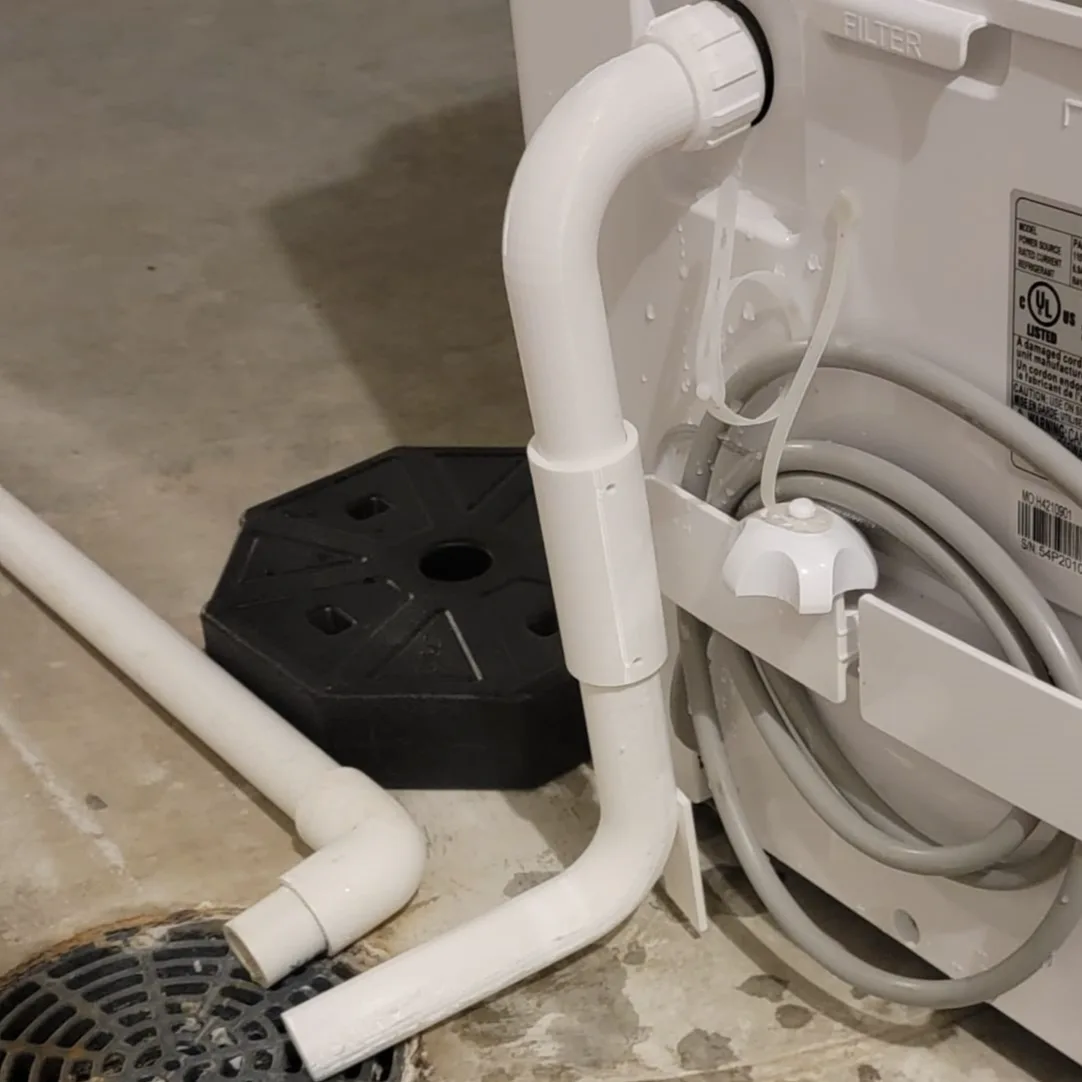
Inspect the drain port and hose monthly. Remove the hose and look inside the port for debris. Dust lint and mold spores accumulate over time.
Flush the port with warm water using a turkey baster or syringe. Replace the rubber washer inside the hose connector once a year. They flatten and lose their seal.
Level the unit. GE dehumidifiers have casters that make them easy to move but also easy to knock out of level. A tilt toward the front causes the bucket to misalign.
A tilt toward the back causes water to pool inside the condensate pan instead of draining toward the spout. Place a small bubble level on top of the unit and adjust the casters until it sits flat. Check again after moving the unit.
Use the continuous drain correctly. If you run a hose to a floor drain verify that the hose runs downhill for its entire length. A dip or rise creates a trap.
Water collects in that low point and bacteria grow. Eventually the trap clogs and water backs up into the unit. Secure the hose so it cannot kink under the weight of furniture or boxes.
Store the unit properly during winter months if you live in a cold climate. Drain all water from the bucket and hose. Tilt the unit backward so any remaining water in the condensate pan runs out the back.
Dry the interior with a towel. Store it upright in a location that stays above freezing. Residual water that freezes inside the pan or drain port can crack the plastic and cause a leak next season.
Replace worn seals when you notice them. The rubber gasket around the bucket door and the seal inside the drain port wear out after two to three years of continuous use. GE sells replacement gaskets for most models.
They cost under ten dollars and take five minutes to install. It is cheap insurance against an overnight flood in your basement.
Frequently Asked Questions
Why is my GE dehumidifier leaking but the bucket is empty?
Check the condensate pan under the coils. It may be cracked or overflowing from a blocked drain spout. Also verify that the float switch is not stuck in the down position.
A stuck float tells the unit to keep running even though the bucket is empty, which can lead to overflow from the pan.
Can I run my GE dehumidifier in an unfinished basement with no floor drain?
Yes, if you use the bucket and empty it regularly. A 50-pint unit fills an 12-pint bucket in roughly six to eight hours in a damp basement. Set a reminder to check it.
For longer run times, a pump model can push water up to a sink or window level without a floor drain.
How do I remove the rubber cap from the continuous drain port?
Unplug the unit. Remove the bucket. Locate the drain port on the back or side of the unit.
Use needle-nose pliers to grip the small black rubber plug and pull straight out. Keep the plug in a ziplock bag taped to the unit in case you need it later.
Why does my GE dehumidifier keep freezing up and then leaking?
Low room temperature under 60 degrees is the most common cause. Clean the filter first. If freezing continues, the unit may need to be moved to a warmer location or the room may need supplemental heat.
Some GE models have a low-temperature operating mode, but they still struggle below 50 degrees.
Is a leaking dehumidifier a fire hazard?
A small leak from the bucket or hose is not a fire hazard by itself. But water that reaches the electrical components or the compressor can cause a short circuit or overheating. If you see water near the control panel or power cord, unplug the unit immediately and let it dry completely before using it again.
How often should I replace the condensate pan?
Replace it only if it cracks. A pan in good condition lasts the life of the unit. Check it annually during filter cleaning.
If you see hairline cracks near the drain spout, replace it before the crack spreads. GE pan part numbers are listed on the underside of the pan itself.