How to Remove a Musty Smell From a Dehumidifier
So you've got a dehumidifier that's supposed to be fighting moisture, but instead it smells like a damp basement. That's frustrating, and it's a sign something is off inside the machine. If you're wondering how to remove a musty smell from a dehumidifier, the answer starts with understanding where the odor is coming from.
In our research, the most common causes are stagnant water in the tank, biofilm buildup in the drain line, and mold growing on the internal coils. The EPA recommends keeping indoor humidity between 30 and 50 percent to prevent mold growth, but even a well-maintained unit can develop odors over time. Let's walk through the fixes step by step.
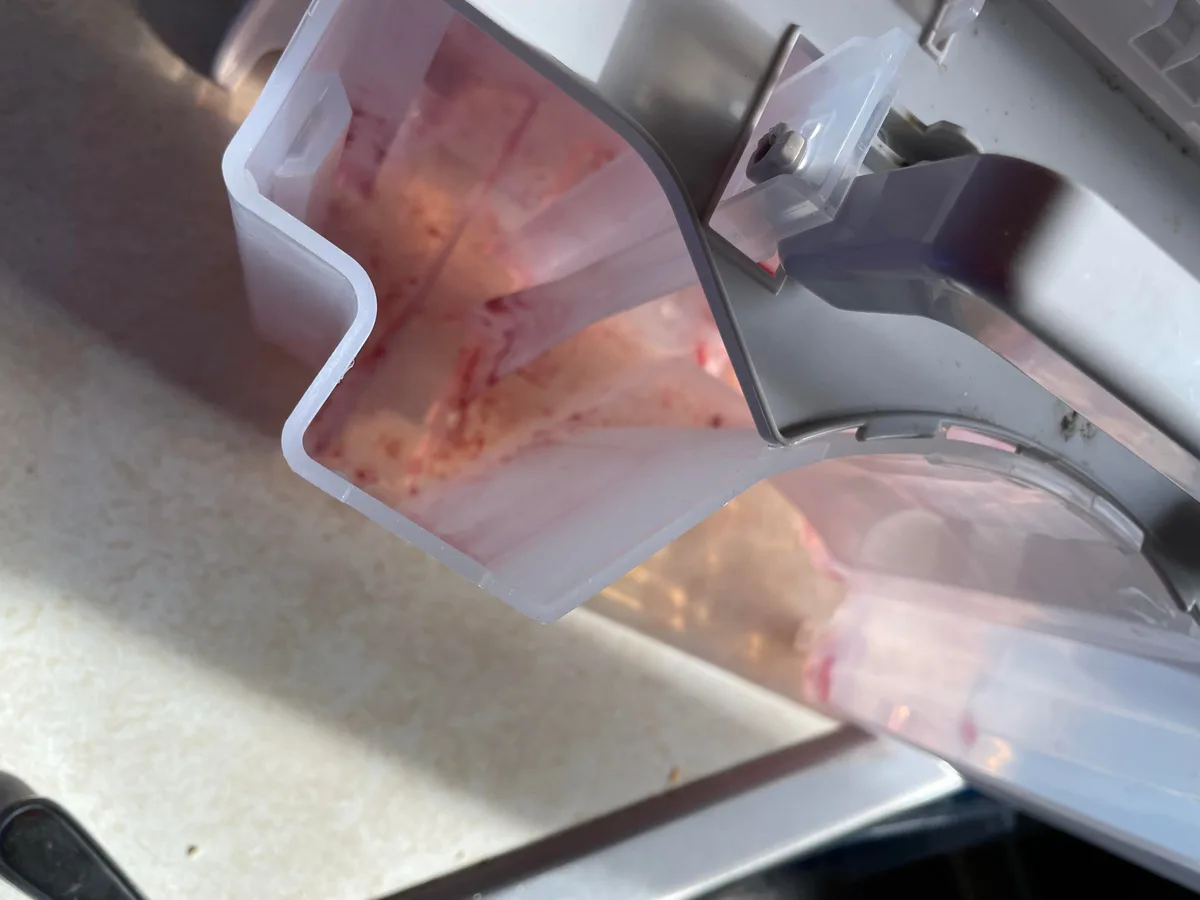
Image source: Bing (Web (fair-use with source credit))
Quick Answer
Remove the water tank. Clean it with vinegar and water. Wash or replace the air filter.
Check the drain hose for slime. Run a cleaning cycle if your unit has one. Dry every part completely before reassembling.
Set humidity to 45 percent to discourage regrowth.
Why Your Dehumidifier Smells Like a Swamp (and Why It Won't Fix Itself)
That musty odor isn't just unpleasant. It's a sign that something inside the unit is growing. Dehumidifiers create the perfect environment for mold, mildew, and bacteria.
They pull moisture from the air, collect it in a tank, and pass it over warm coils. If any part of that system stays damp too long, you get a smell.
The most common sources are:
- The water tank. Stagnant water left sitting for days or weeks develops a sour, musty odor. This is the easiest fix.
- The air filter. A dirty filter traps dust, pollen, and organic matter. Add moisture, and you get mold.
- The evaporator coils. These get cold and collect condensation. If they're dirty, the moisture stays on them and breeds bacteria.
- The drain hose. Slime and biofilm build up inside the hose, especially if you use continuous drainage. That slime smells like rotten eggs or dirty socks.
- The bottom drip tray. Water can collect under the tank or in the base of the unit. If it doesn't drain, it becomes a breeding ground.
Each source requires a different approach. That's why the first step is diagnosing where the smell is coming from. You can't fix what you can't find.
The 10-Minute First Response: Empty, Rinse, and Reset
Before you start taking things apart, try the simplest fix. This works for mild odors that haven't had time to settle into the internal components.
- Unplug the unit. Always start with safety. No power means no risk of shock or damage.
- Empty the water tank completely. Dump it into a sink or drain. Don't just pour it out, rinse it thoroughly with warm water.
- Wash the tank with mild dish soap and warm water. Use a soft sponge. Avoid abrasive scrubbers that can scratch the plastic. Scratches give bacteria places to hide.
- Rinse every trace of soap. Soap residue can leave a chemical smell. Make sure the tank is completely clean.
- Dry the tank with a clean towel, then let it air dry. Moisture is your enemy here. A wet tank will just grow new mold.
- Wipe down the exterior and the area around the intake grille. Use a damp cloth to remove dust and debris.
- Plug the unit back in and run it for one hour. Set the humidity to 45 percent. See if the smell returns.
If the odor is gone, you're done. If it comes back, the problem is inside the unit. You'll need to go deeper.
If you're shopping for a new unit because yours is beyond saving, check our guide to the best dehumidifier for current recommendations.
Where Is the Smell Coming From? A Quick Diagnostic Guide
The fastest way to fix a musty smell is to identify the source. Use your nose and a little logic. Here's how to sniff out the problem.
| Source | What to Check | The Smell |
|---|---|---|
| Water tank | Remove the tank and smell it directly. | Sour, stale, like old gym clothes |
| Air filter | Remove the filter. Hold it to your nose. | Musty, dusty, like a damp basement |
| Drain hose | Disconnect the hose. Smell the open end. | Rotten eggs, sewage, dirty socks |
| Evaporator coils | Shine a flashlight through the grille. | Sweet, earthy, like wet soil |
| Bottom drip tray | Tilt the unit forward. Check for standing water. | Similar to the tank, but stronger |
If the tank smells: Clean it with vinegar and water. Let it soak for 15 minutes. Rinse and dry thoroughly.
If the filter smells: Wash it if it's reusable. Replace it if it's disposable. Do not run the unit without a filter.
If the drain hose smells: Flush it with a solution of one part white vinegar to three parts water. Use a funnel or a squeeze bottle. Let it sit for 10 minutes, then flush with clean water.
If the coils smell: You need to clean the coils. This is a deeper job. We'll cover it in the next section.
If the bottom tray smells: Wipe it dry with a towel. Check for cracks or standing water. If water pools there, the unit may have a leak or a clogged drain path.
The Deep-Clean Workflow: Step-by-Step for Every Source
If the 10-minute fix didn't work, you need to do a full deep clean. Set aside about 30 minutes. Gather your supplies: white vinegar, a soft brush, a microfiber cloth, a vacuum with a brush attachment, and a small container.
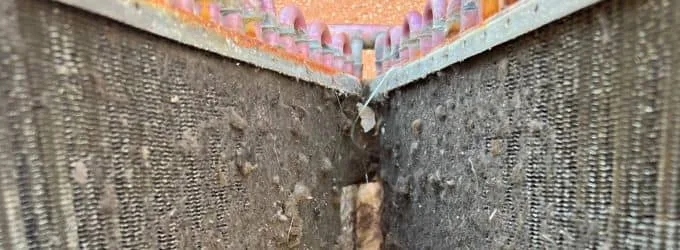
Image source: Bing (Web (fair-use with source credit))
Cleaning the Water Tank and Float Switch
- Remove the tank and empty it completely.
- Fill it halfway with warm water and add one cup of white vinegar.
- Swish the solution around to coat all surfaces. Let it sit for 15 to 20 minutes.
- Scrub the inside with a soft sponge. Pay attention to the corners and the float switch mechanism.
- Rinse thoroughly with clean water. No vinegar smell should remain.
- Dry the tank with a towel and let it air dry completely before reinstalling.
Cleaning or Replacing the Air Filter
- Remove the filter from the unit. Consult your manual if you're not sure where it is.
- If it's a washable filter, rinse it under lukewarm water. Use mild soap if it's heavily soiled.
- Squeeze out excess water. Do not wring or twist the filter. That can damage the fibers.
- Let it air dry completely. This takes several hours. Do not run the unit without a dry filter.
- If it's a disposable filter, replace it with a new one. Manufacturer guidance suggests replacing disposable filters every three to six months.
Cleaning the Evaporator Coils (Without Damaging Them)
The coils are delicate. Use a soft brush or a vacuum with a brush attachment. Do not use metal tools or harsh chemicals.
- Unplug the unit. Remove the filter and the front grille if possible.
- Use a flashlight to inspect the coils. Look for dirt, dust, or visible mold.
- Gently brush the coils with a soft brush. Work from top to bottom. Brush in the direction of the fins.
- Vacuum the loosened debris. Use the brush attachment to avoid bending the fins.
- If you see mold, mix a solution of one part white vinegar to three parts water. Lightly mist the coils. Let it sit for five minutes. Rinse with a spray bottle of clean water.
- Let the coils air dry completely. This takes about an hour.
- Reassemble the unit and run a test cycle.
Clearing Slime from the Drain Hose and Condensate Pump
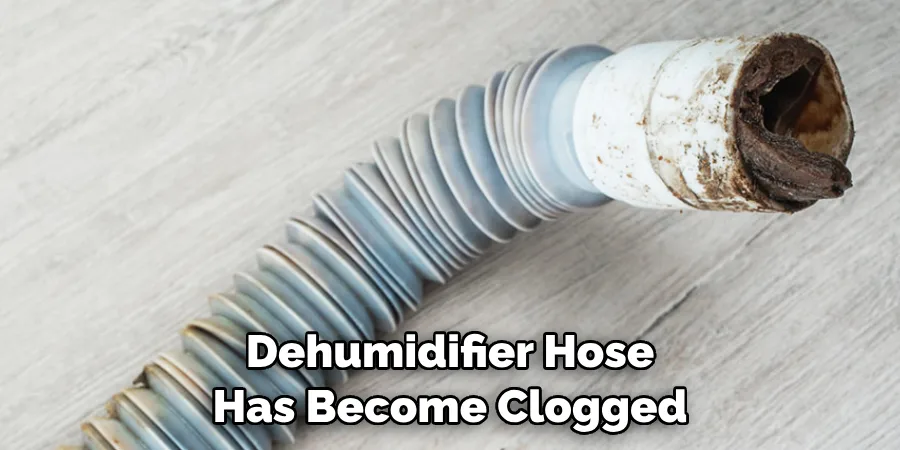
Image source: Bing (Web (fair-use with source credit))
Slime in the drain hose is a common cause of foul odors. It's also easy to fix.
- Disconnect the drain hose from the unit. Be prepared for a little water to spill.
- Mix one part white vinegar with three parts warm water in a measuring cup or squeeze bottle.
- Pour the solution through the hose. Let it sit for 10 to 15 minutes.
- Flush the hose with clean water. Use a funnel or a sink sprayer.
- Check for kinks or blockages. If the hose is cracked or damaged, replace it.
- Reconnect the hose. Make sure it slopes downward. A hose that rises above the unit's drain outlet will trap water and grow more slime.
- If your unit has a condensate pump, check the pump reservoir. Wipe it out with a vinegar solution. Remove any visible slime or debris.
Drying the Bottom Tray and Internal Components
Water can pool in the bottom of the unit. This is especially common in portable dehumidifiers with a bucket-style tank.
- Tilt the unit forward or backward to drain any standing water from the bottom tray.
- Use a microfiber cloth or a towel to absorb any remaining moisture.
- Shine a flashlight into the base. Look for mold, mildew, or debris.
- Wipe the area with a cloth dampened with vinegar solution. Do not soak the electronics.
- Let the unit sit unplugged for at least two hours to air dry completely.
Common Mistakes That Make the Smell Worse (or Damage the Unit)
Even experienced DIYers make mistakes when cleaning a dehumidifier. Here are the ones that cause the most problems.
Using bleach on the coils. This is the biggest mistake. Bleach is corrosive to aluminum. It will eat through the coil fins over time, causing leaks and permanent damage.
Use vinegar instead.
Not drying the tank before reinstalling. A wet tank is a breeding ground for mold. You just cleaned it. Don't put it back wet.
Let it air dry completely.
Running the unit without a filter. The filter protects the coils from dust and debris. Without it, the coils get dirty fast. That leads to more odors and reduced efficiency.
Forgetting the drain hose. The tank gets all the attention, but the drain hose is often the real source of the smell. If you use continuous drainage, clean the hose at least once a month.
Overlooking the float switch. The float switch sits in the water tank. It can collect gunk and slime. Clean it with a vinegar-soaked cloth.
A stuck float switch can cause the unit to shut off prematurely or not drain properly.
Using harsh chemicals. Dehumidifiers are made of plastic, aluminum, and copper. Harsh chemicals like ammonia, hydrogen peroxide, or commercial descalers can damage these materials. Stick with white vinegar and mild dish soap.
Skipping the drying step. Moisture is the enemy. Every part you clean must be dry before you reassemble the unit. This includes the tank, the filter, the coils, and the drain hose.
Patience pays off here.
The CDC provides guidance on mold prevention and cleaning in indoor environments, which applies directly to dehumidifier maintenance. Their recommendations emphasize using non-corrosive cleaners and ensuring complete drying after any cleaning procedure.
How to Keep Your Dehumidifier Smell-Free for Good
Once you've cleaned the unit, the goal is to keep it that way. A little prevention saves you from repeating the deep clean every month.
Set your humidity to 45 percent. The sweet spot for odor prevention is between 40 and 50 percent. Below 40 percent, the unit runs less often, which can leave water sitting in the tank. Above 50 percent, mold and mildew grow faster.
The EPA's indoor air quality guidelines recommend this range for health and comfort.
Empty the tank after every use. If you run the unit daily, don't let the water sit for days. Dump it, rinse it, and dry it. This takes 30 seconds and prevents the sour smell from forming.
Clean the filter every two weeks. A dirty filter traps dust and moisture. That combination grows mold. If you have pets or live in a dusty area, check it weekly.
Washable filters need to dry completely before you put them back.
Use the continuous drain option if you can. Gravity drains keep water moving out of the unit. They don't let water stagnate in the tank. But you still need to clean the drain hose monthly.
Slime builds up inside even with constant flow.
Keep the unit away from walls. The intake grille needs airflow. If the unit is pressed against a wall, it pulls in less air and runs longer. That means more condensation and more moisture inside the machine.
Run a maintenance cycle once a month. Pour a cup of white vinegar through the drain hose or into the tank. Let it sit for 15 minutes. Rinse with clean water.
This breaks up biofilm before it starts to smell.
If you're dealing with a basement dehumidifier that seems to get musty faster than others, check out our guide to the best dehumidifier for basement for tips on picking a model that handles high moisture better.
Frequently Asked Questions
How long does it take to get rid of the musty smell?
For mild odors, a quick tank rinse and filter wash can fix it in under 30 minutes. For deeper smells from coils or drain lines, plan for a full 30 to 60 minute clean. The smell should be gone after the unit runs for an hour.
If it returns, the source is still present.
Can I use bleach to clean my dehumidifier?
Only on the water tank, and only if you dilute it. Use one tablespoon of bleach per gallon of water. Never use bleach on the evaporator coils.
It corrodes aluminum and will damage the unit. White vinegar is safer for most cleaning tasks.
Why does my dehumidifier smell like feet or dirty socks?
That smell is usually bacteria or biofilm growing in the drain hose or the bottom drip tray. It's not mold, but it's just as unpleasant. Clean the hose with a vinegar solution.
Wipe out the drip tray. Let everything dry completely before you run the unit again.
Is it safe to run a dehumidifier that smells musty?
It's usually safe in the short term, but the smell is a sign of mold or bacteria inside the unit. Running it spreads those spores into the air. If you have allergies, asthma, or a compromised immune system, stop using it until you clean it thoroughly.
How often should I deep clean my dehumidifier?
Every three to six months for the full deep clean. That includes the coils, the drain hose, and the bottom tray. The tank and filter need attention every two to four weeks.
The more you use the unit, the more often you should clean it.
Can vinegar really remove the musty smell?
Yes, white vinegar is effective at killing mold and bacteria. It's also safe for the plastic and aluminum parts inside the unit. A 1:1 solution of vinegar and water works for most surfaces.
Let it sit for 15 minutes before rinsing. The vinegar smell fades as it dries.
The Final Verdict: Deep Clean, Replace, or Call a Pro?
You have three options when the smell won't go away. Here's how to choose.
Deep clean it yourself if the unit is less than three years old and the smell is mild. Follow the workflow in this guide. Clean the tank, filter, coils, drain hose, and bottom tray.
Dry everything. Run a test cycle. In most cases, this solves the problem.
Replace the unit if it's older than five years and the smell persists after a deep clean. At that age, the internal components may have permanent mold growth or corrosion. A new unit will be more efficient and won't smell.
Look for models with antimicrobial coatings on the tank and coils.
Call a professional if you've cleaned everything and the smell is still there. A technician can disassemble the unit fully and clean parts you can't reach. They can also check for refrigerant leaks or electrical issues that might be causing the problem.
This is usually worth it for expensive whole-house dehumidifiers.
The decision rule: If you spend more than 30 minutes cleaning and the smell returns within a week, it's time to replace. If the unit is still under warranty, contact the manufacturer first. They may offer a repair or replacement.
Most dehumidifiers can be saved with a good cleaning. The ones that can't are usually old enough to justify an upgrade. Either way, you don't have to live with that smell.