How to Prepare a Dehumidifier for Storage
Preparing a dehumidifier for storage is the difference between a unit that lasts a decade and one that dies in three years. If you’ve ever unpacked a dehumidifier that smells like a wet basement or refuses to start, you know the pain. That’s why it’s a skill worth having.
It saves you money, time, and a lot of frustration.
The EPA recommends keeping indoor humidity between 30 and 50 percent to prevent mold growth. Most dehumidifiers last 5 to 7 years, but improper storage can cut that in half. Mold inside the tank, frozen coils, or a damaged compressor are all common outcomes of skipping the prep work.
Let’s walk through what happens when you get it wrong and how to avoid it.
Quick Answer
To prepare a dehumidifier for storage, unplug it and empty the water tank completely. Clean the filter and coils. Dry everything for 24 to 48 hours.
Store upright in a dry place above freezing. For desiccant units, dry the rotor too, and check your manual for model-specific steps.
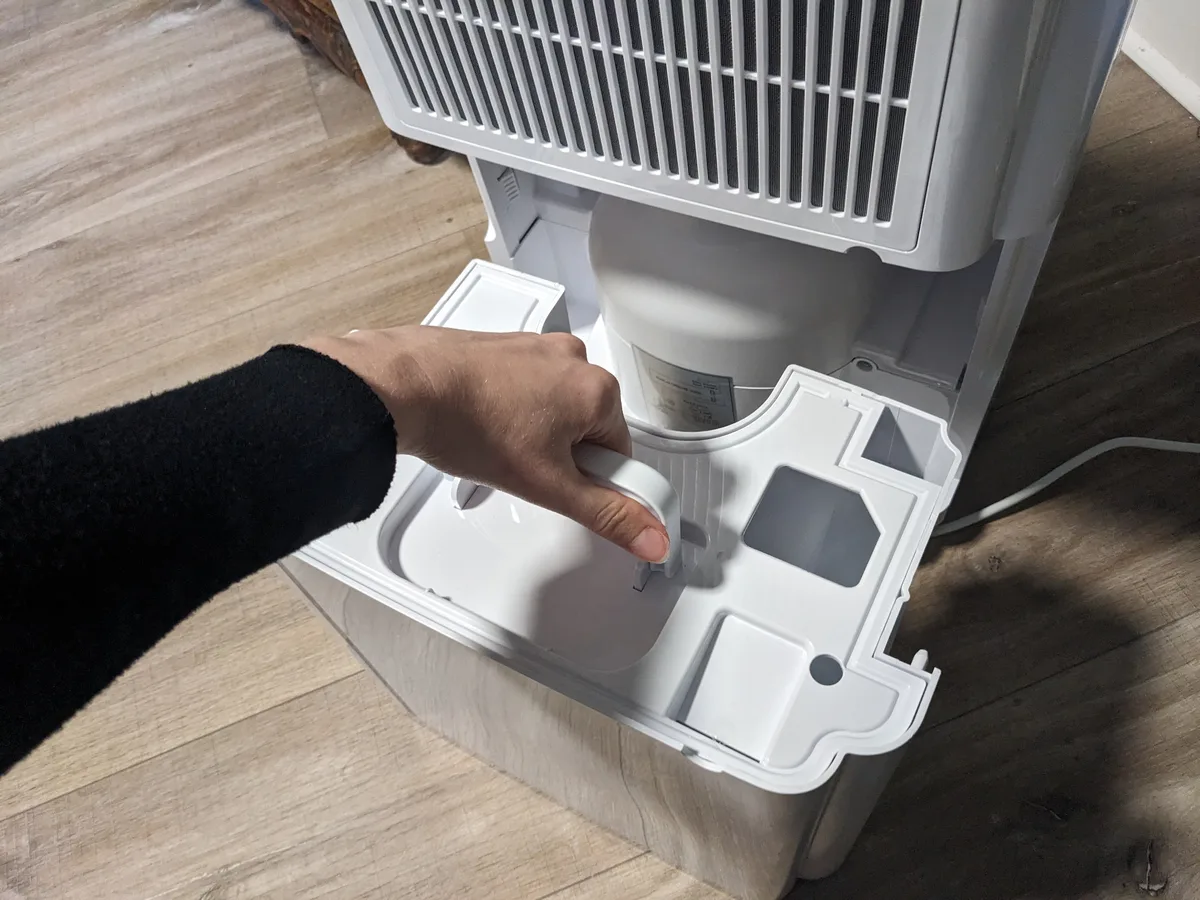
Image source: Bing (Web (fair-use with source credit))
Why Storing a Dehumidifier Wrong Can Ruin It (and How to Avoid That)
A dehumidifier is basically a sealed system. It moves heat and moisture across coils. If you store it wet, dirty, or sideways, you break that system.
Here’s what happens if you skip the work:
- Water left in the bucket or pump line freezes. In an unheated garage, a single freeze can crack the plastic tank or the drain line. That’s a $30 to $50 replacement part as of 2026.
- Moisture inside the unit grows mold. That musty smell when you turn it back on next spring? It’s not just unpleasant. It can aggravate allergies and reduce the unit’s ability to pull moisture.
- Dust and debris on the coils trap heat. If the coils are dirty, the compressor works harder. Over a winter, that can stress the refrigerant system.
- Storing a compressor unit on its side lets oil drain into the refrigerant lines. When you start it up again, the oil can block the expansion valve. The unit runs but doesn’t cool. Most repair techs will tell you that’s a dead unit.
The good news? You can avoid every single one of these problems. It takes about 20 minutes of hands-on work, plus a day of drying time.
The payoff is a unit that starts up clean, quiet, and effective next season.
The First Decision: Compressor vs. Desiccant — Why It Matters
Not all dehumidifiers are built the same. The type you own changes the storage steps. If you follow the wrong process, you can damage the unit.
| Aspect | Compressor Dehumidifier | Desiccant Dehumidifier |
|---|---|---|
| How it works | Uses a refrigeration cycle like an air conditioner | Uses a moisture-absorbing rotor (silica gel or zeolite) |
| Storage danger | Oil can drain into refrigerant lines if stored on its side | Rotor stays wet and can grow mold or lose efficiency |
| Key step | Must be stored upright in a frost-free space | Must dry out the rotor fully before storage |
| Temp risk | Freezing temps can damage the compressor and crack the bucket | Less sensitive to cold, but still needs a dry place |
If you own a compressor unit, never store it in a space that drops below freezing. The standing water in the condensate pump or bucket can freeze and expand. The compressor itself relies on oil that stays in the right place only when the unit is upright.
If you own a desiccant unit, your biggest risk is a wet rotor. The desiccant material absorbs moisture while running. If you pack it away while it’s still saturated, you’ll likely find mold growing on the rotor by spring.
Some units have a “recharge” or “dry” mode you can run before storage. Check your manual.
If you’re shopping for a new unit instead of storing an old one, our best dehumidifier guide covers the top models. But if you’re keeping the one you have, read on. The storage workflow below branches based on this decision.
The Step-by-Step Storage Workflow (Your Unit Type Determines the Path)
This workflow has five steps. Each step applies to both types unless noted. Follow the “if/then” logic for the desiccant detour.
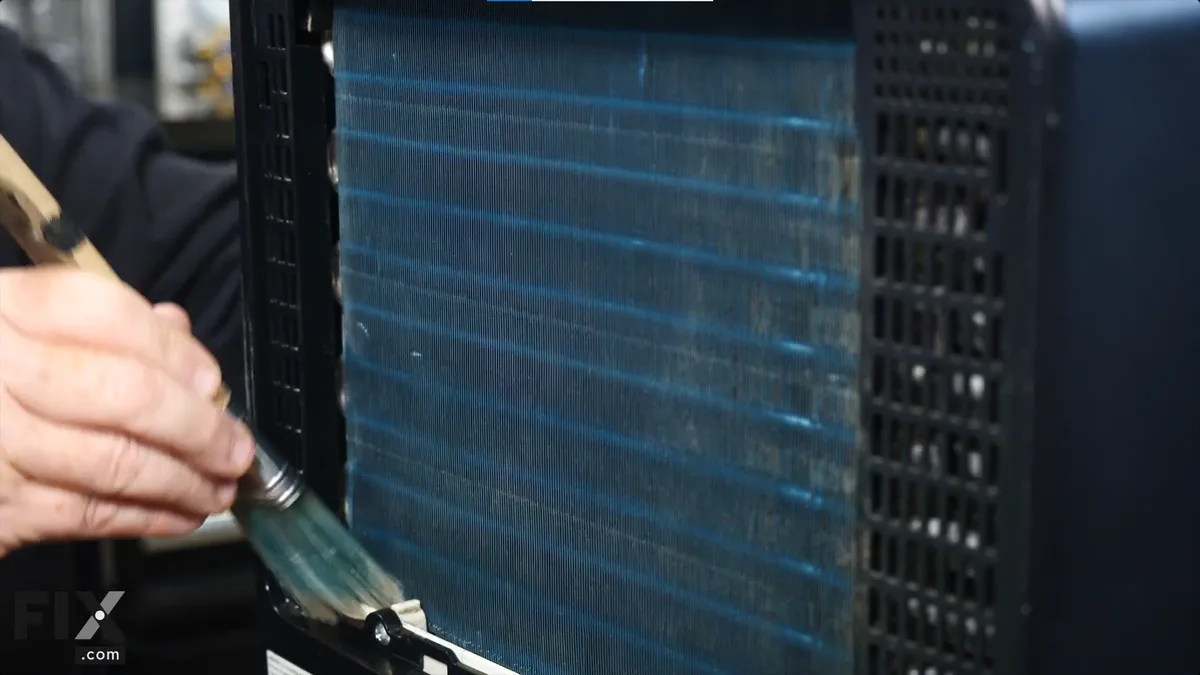
Image source: Bing (Web (fair-use with source credit))
Step 1: Shut Down, Unplug, and Empty Everything
Turn off the dehumidifier from the control panel. Unplug it from the wall. Don’t just flip the switch on a power strip.
Remove the water bucket. Pour any standing water into a sink or drain. If your unit has a continuous drain hose, disconnect it from the back.
Water will still be sitting in the hose. Tilt the hose into a bucket or sink until it stops dripping.
If you have a condensate pump, check the pump reservoir. There’s almost always a small amount of water trapped in the pump basin. Tip it out or use a towel to soak it up.
Step 2: Clean the Filter, Coils, and Water Bucket
Remove the air filter. Most are washable. Rinse it under warm running water.
If it’s very dirty, use a drop of mild dish soap. Let it air dry completely before reinstalling.
Vacuum the evaporator and condenser coils. Use a soft brush attachment on your vacuum. Dust and pet hair trap heat, making the compressor work harder.
If you can see light through the coils, you’re done.
Wash the water bucket with warm water and a mild detergent. Rinse well. Dry it with a clean towel.
Set it aside to air dry completely.
Step 3: Dry the Unit Out Completely
This is the step most people rush. Water hides inside the unit. It sits in the drip tray, inside the drain port, and on the fan blades.
Let the unit sit unplugged with the bucket removed for 24 to 48 hours. Leave the door or grille open if the design allows. Point a fan at the unit to speed up the process.
If you can’t wait that long, 12 hours is the bare minimum, but 24 is safer.
Step 4: The Desiccant Detour (If You Own One)
If you own a compressor unit, skip this step.
If you own a desiccant unit, check your manual for a “recharge” or “dry” mode. This runs the fan and heater to dry the rotor. Some units run this cycle automatically.
Others require you to select it manually.
If your unit doesn’t have a recharge mode, run the dehumidifier in a low-humidity room for a few hours with the bucket empty. The rotor will dry out as the unit pulls moisture from the air. Let it cool down fully before storage.
Step 5: Wrap the Cord, Pack the Unit, Pick the Right Spot
Wrap the power cord loosely. Don’t wind it tight around the base or wedge it between coils. Kinking the cord can damage the insulation.
If you have the original box and Styrofoam, use it. The box protects the unit from dust and bumps. If you don’t have the box, cover the unit with a breathable cloth.
Do not use a plastic bag. Trapped moisture can cause condensation and rust.
Store the unit upright in a dry location. A climate-controlled basement or a heated storage room is ideal. An unheated garage or shed is risky for compressor units.
If you have no choice, at least move the unit inside for the coldest months.
The Two Biggest Mistakes People Make (and How to Catch Them)
Most damage happens because of two common errors. Here’s how to spot them before they cost you.
Mistake 1: Storing the unit on its side.
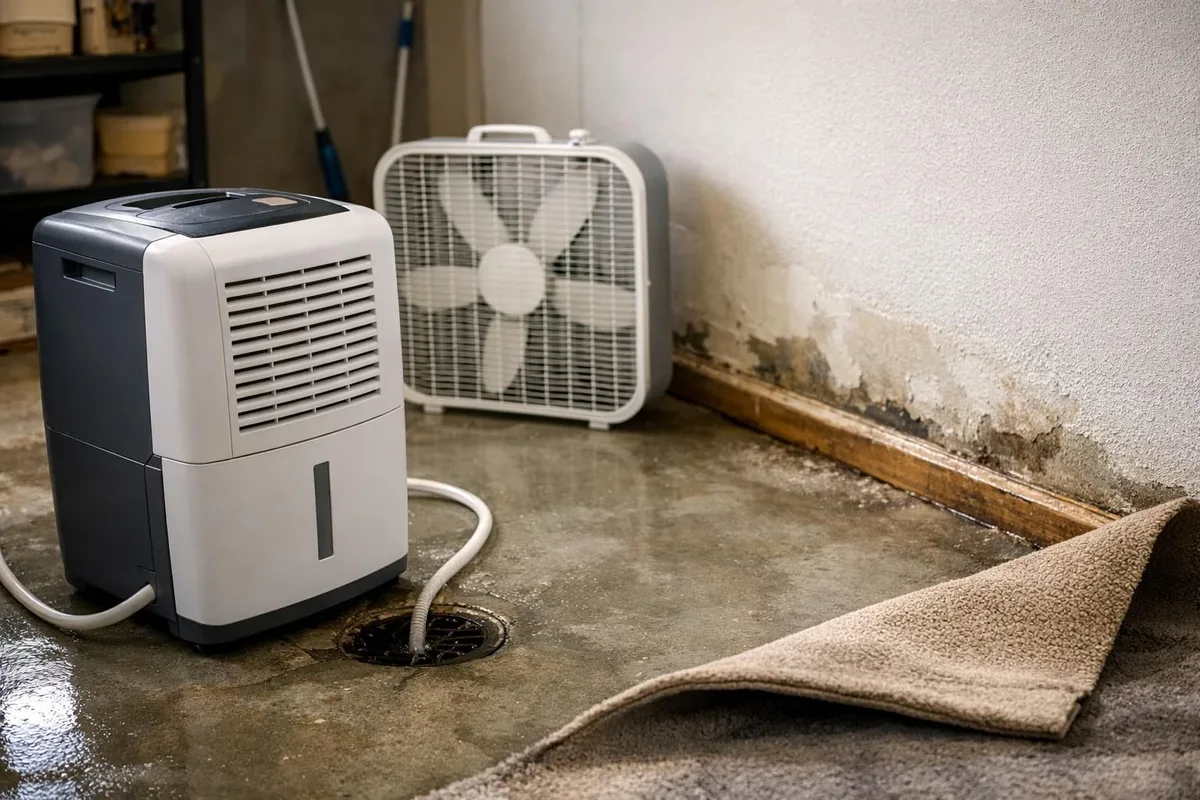
Image source: Bing (Web (fair-use with source credit))
This is the number one cause of compressor failure. When you lay the unit on its side, compressor oil flows into the refrigerant lines. Start it up, and the oil blocks the expansion valve.
The unit runs but doesn’t cool. This kind of internal damage needs a professional repair, and it’s rarely worth the cost.
How to catch it: Always store the unit upright. If you must transport it flat, lay it on the side that has the compressor. Check the manual for which side that is.
Let the unit sit upright for 24 hours before plugging it in. That gives the oil time to drain back.
Mistake 2: Not drying the unit before storage.
Water inside the unit is a breeding ground for mold. If you pack it away damp, you’ll open it next season to find a musty smell that won’t go away.
How to catch it: After cleaning, leave the unit unplugged with the bucket out for a full 24 hours. If you have a desiccant unit, run the recharge cycle. If you’re in a hurry, at least wipe down the interior with a dry cloth and point a fan at the unit for a few hours.
Storing a Dehumidifier in a Garage, Basement, or RV: What Changes
The location changes the risks. Here’s what to watch for in each spot.
Garage or shed. These spaces are often unheated. If you store a compressor unit here, you risk freezing. The bucket can crack, the drain line can split, and the compressor oil can thicken.
If you have no better option, drain everything completely, remove the bucket, and store it inside your house. Cover the unit but leave the drain port open.
Basement. This is usually the safest spot. Basements are climate-controlled and dry. But they’re also dusty.
Make sure the unit is covered with a breathable cloth. Check for any signs of moisture on the floor before you set the unit down. If you’re storing a unit in a basement that’s prone to flooding, elevate it on a small platform.
RV or camper. RVs are tight spaces with limited storage. The unit needs to be secured so it doesn’t slide around during travel. Use straps or bungee cords to hold it upright.
If the RV is stored outdoors in winter, remove the unit and store it in a heated space. For units that stay in the RV year-round, look for a compact model with freeze protection.
FAQs About Dehumidifier Storage
How long can I leave water in the dehumidifier before storing it?
Don’t leave water in it at all. Standing water in the bucket or drain line grows mold within 48 hours. Empty the bucket, dry the drain port, and let the unit air out.
If you skip this step, you’ll likely find pink or black slime inside when you reopen the unit.
Can I store my dehumidifier in an unheated garage?
Only if it’s a desiccant unit. Compressor units can be damaged by freezing temperatures. The water left in the condensate pump or drain hose can freeze and crack the plastic.
If you must store a compressor unit in a garage, drain everything completely and move the bucket indoors.
What happens if I store a dehumidifier on its side?
Storing a compressor unit on its side lets compressor oil flow into the refrigerant lines. When you start it up, the oil blocks the expansion valve. The unit runs but doesn’t cool.
Most repair shops will tell you it’s cheaper to replace the unit than to fix this damage.
Do I need to clean the coils before storing the unit?
Yes. Dirty coils trap heat and make the compressor work harder. Dust and pet hair on the evaporator coils can also hold moisture, which leads to rust.
Use a soft brush attachment on your vacuum. If you can see light through the coils, they’re clean enough.
Should I remove the batteries from the dehumidifier before storage?
If your unit has a remote control or a battery-powered humidistat, yes. Batteries can leak over time, especially in fluctuating temperatures. Remove them and store them separately.
This prevents corrosion damage to the circuit board.
How often should I replace the filter before storing?
Replace the filter if it’s torn or heavily clogged. Most washable filters last 6 to 12 months. If you clean the filter before storage, you can reuse it.
But if it’s worn out, install a new one. A dirty filter forces the unit to work harder and reduces its lifespan.
The Quick-Check Decision Guide (Your At-a-Glance Reference)
This guide covers the key decisions from the whole workflow. Use it as a checklist when you’re ready to store your unit.
| Decision Point | What to Do | Why It Matters |
|---|---|---|
| Your unit type | Compressor: store upright above freezing. Desiccant: dry the rotor first. | Wrong storage can damage the refrigerant system or grow mold. |
| Water bucket | Empty and dry completely. | Standing water freezes, cracks plastic, and grows mold. |
| Air filter | Remove, wash, and dry. | A dirty filter traps moisture and dust inside the unit. |
| Coils | Vacuum with a soft brush. | Dust on coils forces the compressor to work harder. |
| Drain hose | Disconnect and drain all water. | Water left in the hose can freeze and split the line. |
| Cord | Wrap loosely, don’t kink. | A kinked cord can damage the insulation over time. |
| Storage location | Dry, above freezing, upright. | Moisture and cold shorten the unit’s lifespan. |
| Box or cover | Use original box or breathable cloth. | Plastic traps condensation and causes rust. |
| Batteries | Remove from remote or control panel. | Leaking batteries can corrode the circuit board. |
Follow this checklist, and your dehumidifier will start up clean and quiet next season. No musty smells. No frozen parts.
No expensive repairs. Just plug it in, set the humidity, and let it work.