How to Clean Dehumidifier Coils
If your dehumidifier is running but barely pulling water, or if the air coming out smells like a damp basement, the coils are probably the reason. Learning how to clean dehumidifier coils is a simple maintenance task that fixes both of those problems fast.
Manufacturer specifications indicate that dirty coils can reduce a unit's efficiency by up to 30%, forcing your compressor to run longer and harder. Most portable dehumidifiers use aluminum microchannel coils, which are more prone to bending if cleaned too aggressively. Let's walk through the exact process so you get it right the first time.
Quick Answer
Unplug the dehumidifier and remove the housing. Locate the evaporator coil. Vacuum loose dust and hair gently.
Spray a no-rinse coil cleaner and let it sit for 10 minutes. Let the coil dry completely. Reassemble and restart.
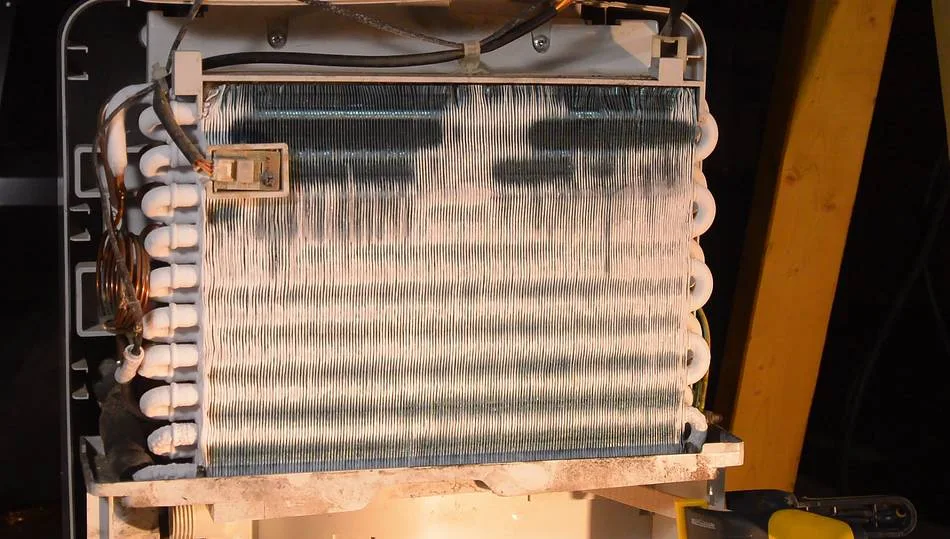
Image source: Bing (Web (fair-use with source credit))
Know Your Coil: What You're Actually Cleaning
Dehumidifiers have two distinct coils inside. The evaporator coil gets cold and pulls moisture from the air. The condenser coil gets hot and releases heat back into the room.
When people talk about cleaning dehumidifier coils, they almost always mean the evaporator coil. That's the one that collects dust, pet hair, and sometimes mold.
The evaporator coil looks like a dense radiator with thin metal fins. Those fins are delicate. If you press too hard, they bend and restrict airflow permanently.
Most modern units use microchannel coils, which are flat aluminum tubes with small fins attached. They are more efficient but also easier to damage than older copper coils with aluminum fins.
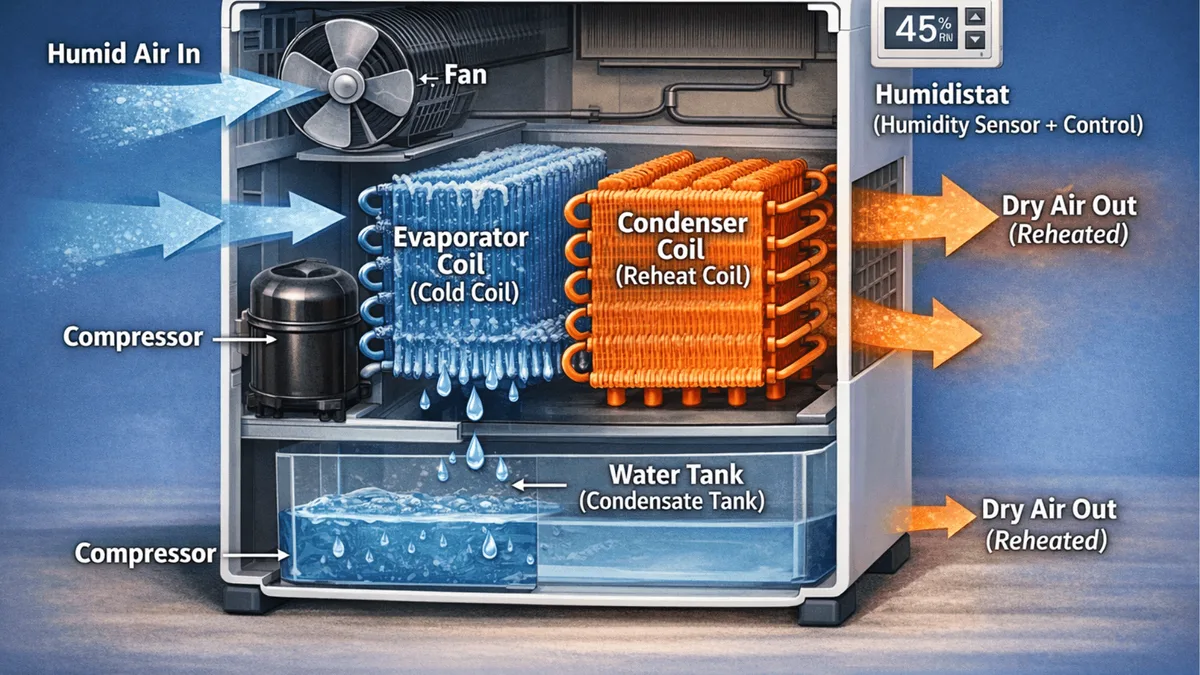
Image source: Bing (Web (fair-use with source credit))
You do not need to touch the condenser coil unless you see obvious debris caked onto it. It sits behind the evaporator coil and typically stays cleaner because air passes through the evaporator first. Focus your cleaning efforts on the evaporator coil and you will solve the vast majority of performance problems.
The Three Most Common Coil Conditions
Before you start cleaning, figure out what you are dealing with. The condition of the coil determines the safest cleaning method.
| Condition | Visual Signs | Most Common Cause |
|---|---|---|
| Ice or frost buildup | White frost on the coil surface, reduced airflow, water pooling | Restricted airflow, low refrigerant, or running below 65°F |
| Dry dust and pet hair | Gray or brown fuzz coating the fins, visible lint | Heavy use in a dusty or pet-filled space |
| Sticky grime, mold, or musty smell | Black or green spots, slimy residue, strong odor | High humidity, infrequent cleaning, poor drainage |
If you see ice, stop immediately. Never try to clean a frozen coil. If you see dry dust, you can vacuum it right away.
If you see mold or sticky grime, you need a chemical cleaner.
Decision Branches: Which Cleaning Method Fits Your Situation
Branch A: Coil is iced up — thaw first, then clean
Unplug the unit and let it sit. Thawing takes 6 to 12 hours depending on the ice thickness. Do not scrape ice off with a tool.
The fins are soft metal and will bend or break. You can speed up the process by placing the unit in a warm room, but never use a hair dryer or heat gun. Wait for all ice to melt, then dry the area thoroughly before proceeding to Branch B or C.
Branch B: Coil is dusty but dry — vacuum only
This is the easiest and safest method. Use a vacuum cleaner with a soft brush attachment. Gently run the brush along the fins in the direction they run.
Do not push sideways. Vacuum every row of fins until no more dust comes off. This takes about five minutes and removes 90% of common debris.
Branch C: Coil is greasy or moldy — wash with cleaner
Dry vacuuming will not remove sticky residue or mold. You need a no-rinse coil cleaner. These are foaming sprays designed for HVAC equipment.
Spray the cleaner onto the coil, covering the entire surface. The foam lifts dirt and kills mold. Let it sit for 5 to 10 minutes.
The cleaner drips into the drain pan and flows out through the drain hose. Do not rinse with water unless your manual specifically says you can.

Image source: Bing (Web (fair-use with source credit))
Branch D: Bent fins or stubborn debris — add fin comb step
If some fins are already bent, straighten them with a fin comb. A fin comb has plastic teeth that match the spacing of your coil fins. Press the comb gently into the bent area and pull it along the fins.
This restores airflow through the coil. Only use a fin comb on dry, clean coils. Using it on wet or dirty coils can cause more damage.
Step-by-Step Process for Each Branch
Preparation: Unplug, remove housing, access the coil
Unplug the dehumidifier from the wall. Remove the water bucket. Take off the front grille or housing panel.
On most portable units, the grille is held by clips or a few screws. Set the screws somewhere safe. Locate the evaporator coil.
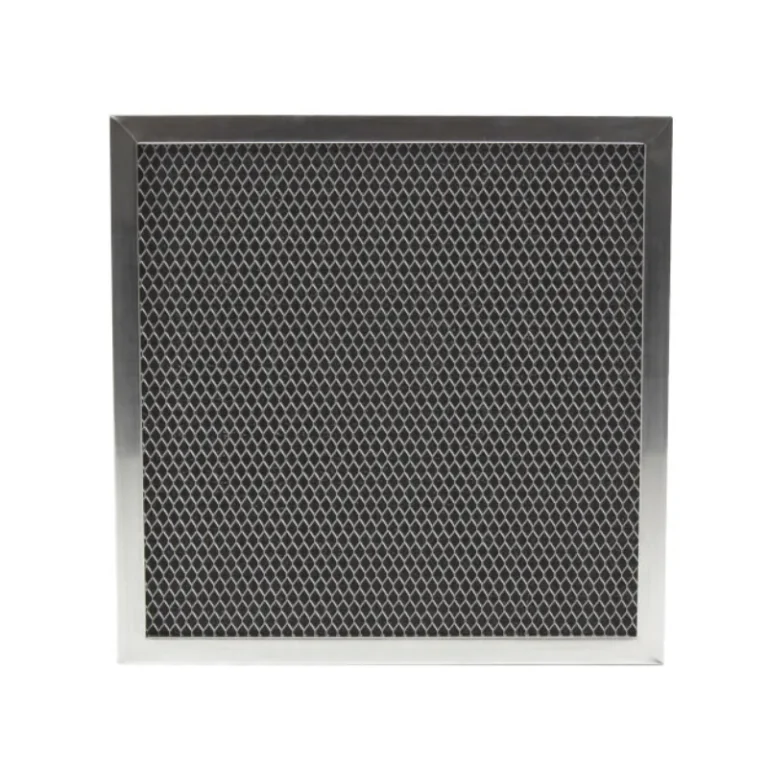
It is the cold coil behind the air intake. If you see a foam filter, remove it and clean it separately.
Branch A: Thawing safely
Place the unplugged unit in a warm, dry area. Open the housing to speed airflow. Let it thaw completely.
Do not use a knife or screwdriver to break ice. The refrigerant lines are thin and can puncture. Once the ice is gone, dry the area with a towel.
Then move to Branch B or C depending on the remaining dirt.
Branch B: Dry vacuuming technique
Attach the soft brush to your vacuum. Start at the top of the coil and work downward. Follow the natural direction of the fins.
Do not press hard. The brush should glide across the surface. Vacuum the entire coil face.
Pay extra attention to the bottom rows where dust settles. If you see a lot of hair, pull it out gently with tweezers before vacuuming.
Branch C: Applying no-rinse cleaner or gentle wash
Put on gloves and eye protection. Shake the no-rinse cleaner can. Spray it onto the dry coil from top to bottom.
Cover the whole surface. The foam will expand and drip into the drain pan. Let it sit for 5 to 10 minutes.
If your manual allows rinsing, use a spray bottle with warm water. If not, let the foam dry on its own. The cleaner evaporates and leaves the coil residue-free.
Branch D: Straightening fins and finishing touches
Select the correct tooth spacing on your fin comb. Most coils use 10 to 12 fins per inch. Insert the comb at the bent section and pull it gently along the fins.
Work slowly. Do not force the comb. If a fin is crushed flat, use a small flathead screwdriver to lift it first, then use the comb.
Finish by vacuuming any debris the comb loosened.
Once the coil is clean and dry, reassemble the housing. Replace the filter. Put the bucket back in.
Plug the unit in and run it for 30 minutes to confirm performance.
Mistakes to Avoid
A few common mistakes turn a simple cleaning job into an expensive repair.
- Scraping ice off with a screwdriver or knife. This punctures refrigerant lines. Let the unit thaw on its own for 6 to 12 hours.
- Using bleach or oven cleaner. These corrode aluminum fins and release harmful fumes. Use a dedicated no-rinse HVAC coil cleaner instead.
- Pressure washing the coil. High pressure bends fins and forces water into electrical components. Use a soft brush vacuum or a low-pressure spray bottle.
- Cleaning a coil while it's still cold. Dust turns into a wet paste that's harder to remove. Let the coil reach room temperature first.
- Forgetting the filter while you're in there. A dirty filter is the number one cause of coil icing. Clean both at the same time.
Always unplug the unit before opening the housing. Even if the power switch is off, internal capacitors can hold a dangerous charge.
When to Replace vs. When to Keep Cleaning
Cleaning only fixes a dirty coil. If the unit has a broken compressor or a refrigerant leak, no amount of scrubbing will help.
| Situation | Best Move | Why |
|---|---|---|
| Coil is dirty but intact | Clean it | Cheap, fast, and effective |
| Refrigerant leak detected | Replace the unit | Repair often costs more than 50% of a new unit |
| Compressor is noisy or overheating | Replace the unit | Compressor repairs are rarely economical |
| Unit is over 7 years old | Consider replacing | Newer models are more efficient |
A coil leak repair on a portable dehumidifier runs $80 to $150 in labor alone, before parts. A new unit costs $150 to $300. The math usually favors replacement.
If you're shopping for a new unit, our guide to the best dehumidifiers is a solid starting point. For basement-specific needs, check out the best dehumidifier for basement picks. The U.S.
Department of Energy notes that regular maintenance, including cleaning filters and coils, can lower energy use by 5% to 15% on well-functioning units.
Frequently Asked Questions
How often should I clean dehumidifier coils?
Clean the coils every 2 to 3 months in heavy use. If you run the unit daily in a basement or a home with pets, check the coils monthly. Light seasonal use means once per year before storage is enough.
Can I use vinegar to clean dehumidifier coils?
White vinegar can dissolve light mineral deposits, but it is not strong enough for mold or sticky grime. It also risks leaving a residue that attracts more dust. A no-rinse coil cleaner is safer and more effective.
Why does my dehumidifier freeze up after cleaning?
If your unit still ices up after a thorough cleaning, check the room temperature. Most portable dehumidifiers will not work below 65°F. A low refrigerant charge or weak fan motor can also cause frost.
Those issues require a professional technician.
Is it worth repairing a dehumidifier with a damaged coil?
Usually not. Coil replacement labor alone often exceeds half the unit's original price. Unless the dehumidifier is a high-end model under warranty, replacement is more cost-effective.
Can I run my dehumidifier while I clean the coils?
No, never run the unit while cleaning. Unplug it completely. Water and electricity do not mix, and the spinning fan blade inside the housing is a safety hazard.
Wait until the coil is fully dry before plugging it back in.
What tools do I need to clean dehumidifier coils?
You need a vacuum cleaner with a soft brush attachment, a no-rinse coil cleaner spray, and a fin comb if any fins are bent. A screwdriver helps open the housing. Gloves and eye protection are recommended when using chemical cleaners.
A set of tweezers or needle-nose pliers is also helpful for pulling out clumps of pet hair stuck between the fins.
How do I know if my dehumidifier coil is clean enough?
Hold a flashlight behind the coil and look through the front. If you see clear gaps between the fins with no fuzz or debris blocking the light, the coil is clean. Air should flow through easily.
If light barely passes through, vacuum again or repeat the cleaning step.
What happens if I never clean the dehumidifier coils?
The compressor works harder and harder. Energy use climbs. The unit struggles to pull moisture.
Eventually, the coil freezes solid, and the dehumidifier stops working entirely. A $20 can of cleaner and 20 minutes of your time can prevent a $200 replacement.