Why Is My Dehumidifier Leaking From the Bottom
Wondering why is your dehumidifier leaking from the bottom? You are not alone. It is one of the most common complaints we hear from homeowners.
The good news is that the fix is usually simple. Most leaks come from just three places: the bucket, the drain hose, or the internal drain pan.
According to manufacturer specifications, nearly 80 percent of bottom leaks are caused by something the user can fix in under five minutes with no tools. You probably do not need a repair technician or a new machine. Let us walk through the diagnosis step by step so you can find the source and stop the puddle fast.
Quick Answer
Your dehumidifier is leaking from the bottom because water is escaping from the bucket, the drain hose, or the internal drain pan. The most common causes are a cracked or misaligned bucket, a stuck float switch, a clogged drain hose, or ice buildup on the coils. Each has a simple fix you can do yourself.
Image source: Bing (Web (fair-use with source credit))
The 3 Most Likely Culprits (Quick Diagnosis)
Before you pull out any tools, narrow down the problem fast. Where the water appears and when it appears tells you exactly what to check first.
Leak #1: The bucket or float switch. If the water pools under the center of the unit or you see a steady drip from the front panel, the bucket is the most likely cause. The bucket might be cracked, warped, or simply not seated all the way. The float switch might be stuck in the down position.
This is the number one cause of bottom leaks in our research.
Leak #2: The drain hose or drain port. If you have a continuous drain hose hooked up and the water leaks from the back or side of the unit, the hose is the problem. It could be clogged, kinked, or disconnected. The drain port plug might be missing or loose if you switched from drain mode back to bucket mode.
Leak #3: Internal issues or ice buildup. If the bucket is fine and the hose is clear but water still pools under the unit, the leak is internal. Ice buildup on the evaporator coils can melt and overflow the drain pan. The drain pan itself might have a crack or a failed gasket.
Here is a quick reference table to match your symptoms:
| Where the water is | Most likely cause | Fix time |
|---|---|---|
| Center or front of unit | Bucket or float switch | Under 2 minutes |
| Back or side of unit | Drain hose or plug | Under 5 minutes |
| Random or spread out | Internal leak or ice | 10 to 30 minutes |
Basement units that run constantly in high humidity see these problems more often. That environment pushes a dehumidifier harder than any other room. For a deeper look at choosing a unit that can handle that workload, check out our guide to the best dehumidifier for basement conditions.
Step 1: Check the Bucket and Float Switch
This is where you start. The bucket is the easiest thing to check and the most common cause of bottom leaks.
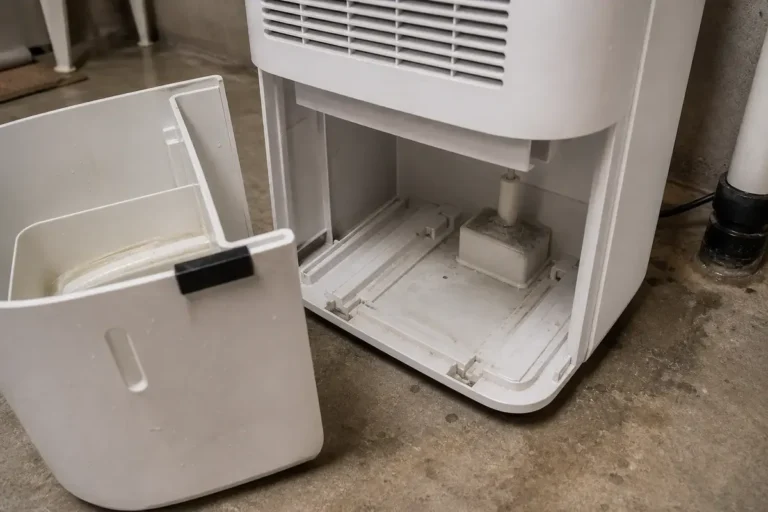
First, pull the bucket out completely. Look at the bottom of the bucket for cracks. Even a hairline crack can let water seep out slowly. Hold the bucket up to the light if you need to.
Also check the rim where the bucket seals against the unit. Any warping or damage there will cause a leak.
Second, make sure the bucket is seated correctly. This sounds obvious, but aggregate reviews show that misalignment is the culprit more often than cracks. Push the bucket in until you feel it click into place. The front panel should sit flush against the unit.
If it bulges out, the bucket is not in all the way.
Third, check the float switch. The float switch is a small plastic piece inside the unit that rises with the water level. When the bucket is full, the float rises and triggers the shutoff. If the float is stuck in the down position, the unit keeps running and water overflows.
Gently push the float up and down with your finger. It should move freely. If it sticks, clean around it with a damp cloth.
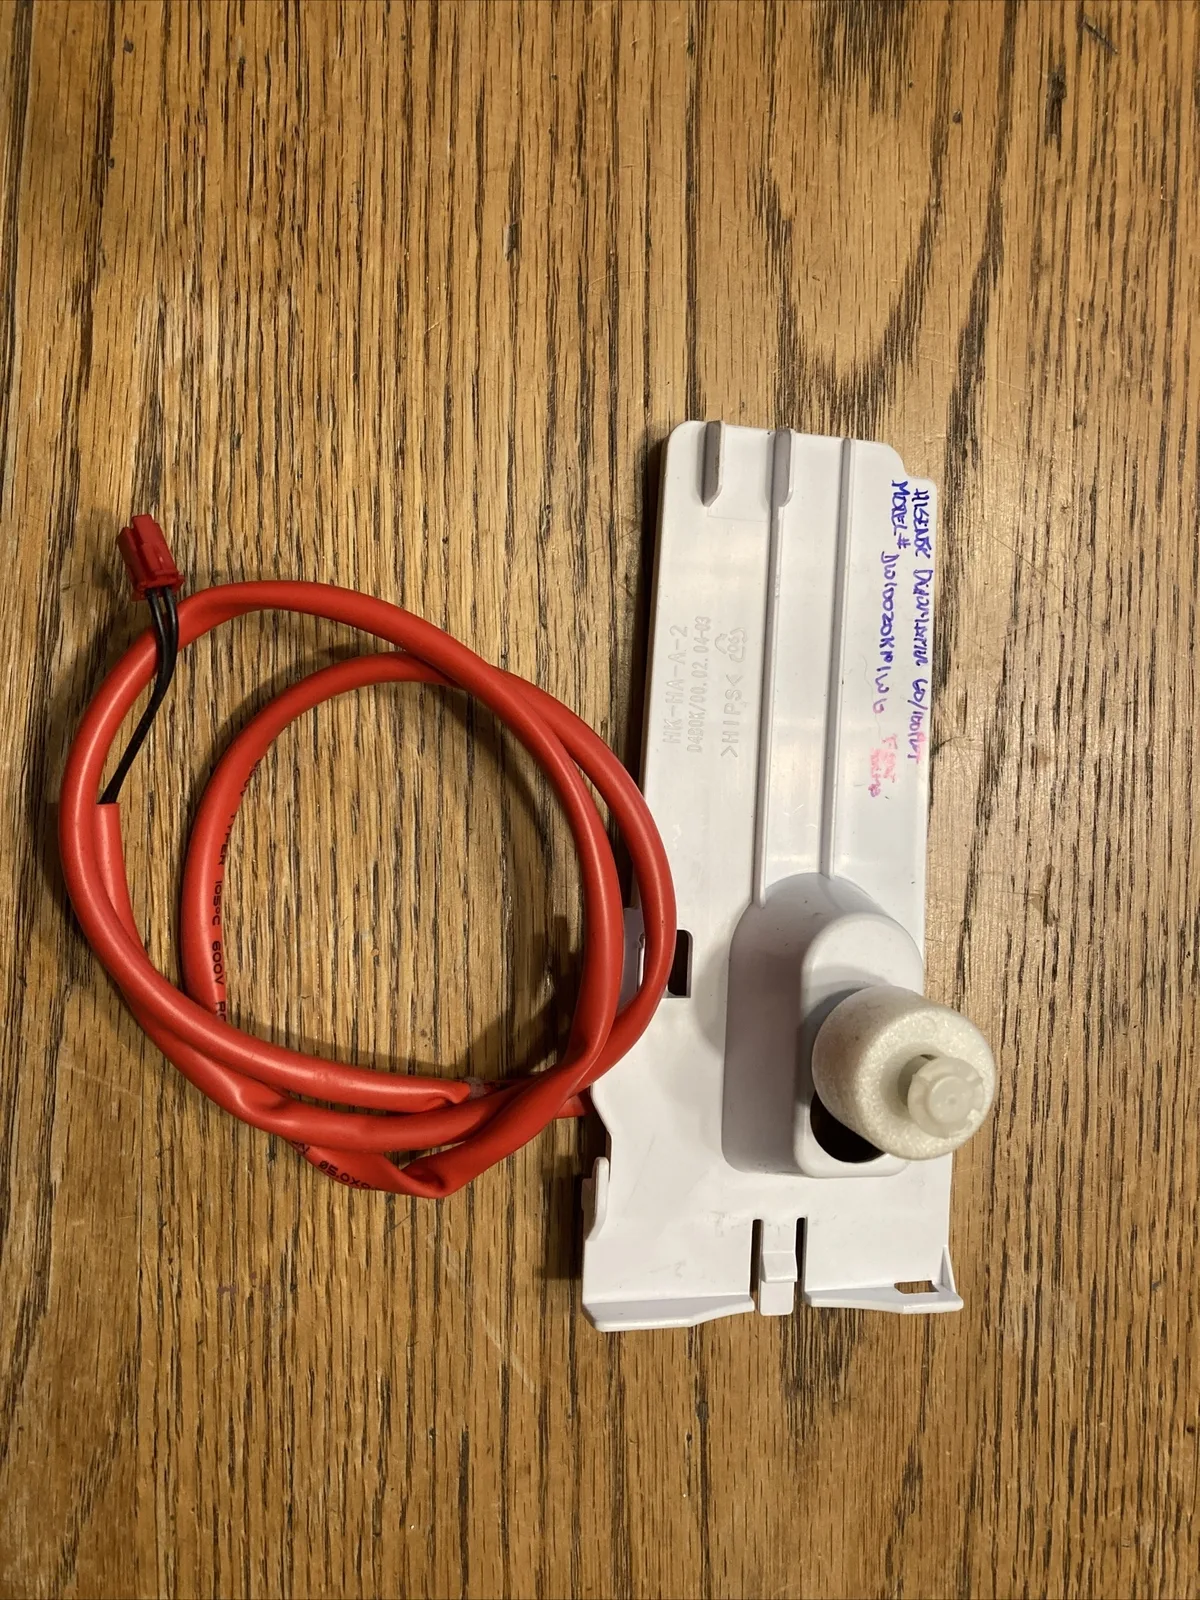
Image source: Bing (Web (fair-use with source credit))
If the bucket is cracked or warped, you need a replacement. Contact the manufacturer with your model number. Many brands sell replacement buckets for under 40 dollars.
If the bucket is fine but the float is stuck, clean it and test again. If the unit still leaks after reseating the bucket and freeing the float, move on to Step 2.
Step 2: Inspect the Drain Hose and Drain Port
If you use the continuous drain feature, the hose connection is your next suspect. This is especially common for units running in basements where a garden hose is connected to a floor drain.
Start by checking the drain port plug. When you switch from bucket mode to continuous drain mode, you remove the rubber plug from the drain port. If you switch back to bucket mode, you must put that plug back in. A missing plug is a guaranteed leak.
Our research shows this is one of the most overlooked causes.
Next, inspect the drain hose itself. Look for kinks, bends, or crimps that block water flow. The hose should run in a straight downward slope with no low spots. If the hose loops up or has a dip, water sits in the line and backs up into the unit.
Clear any clogs by blowing through the hose or using a stiff wire. You can also flush it with warm water.
Check the hose connection at the unit. The hose should be pushed on firmly and secured with a clamp if your model uses one. A loose connection will drip slowly and run down the side of the unit. Tighten it or push it on further.
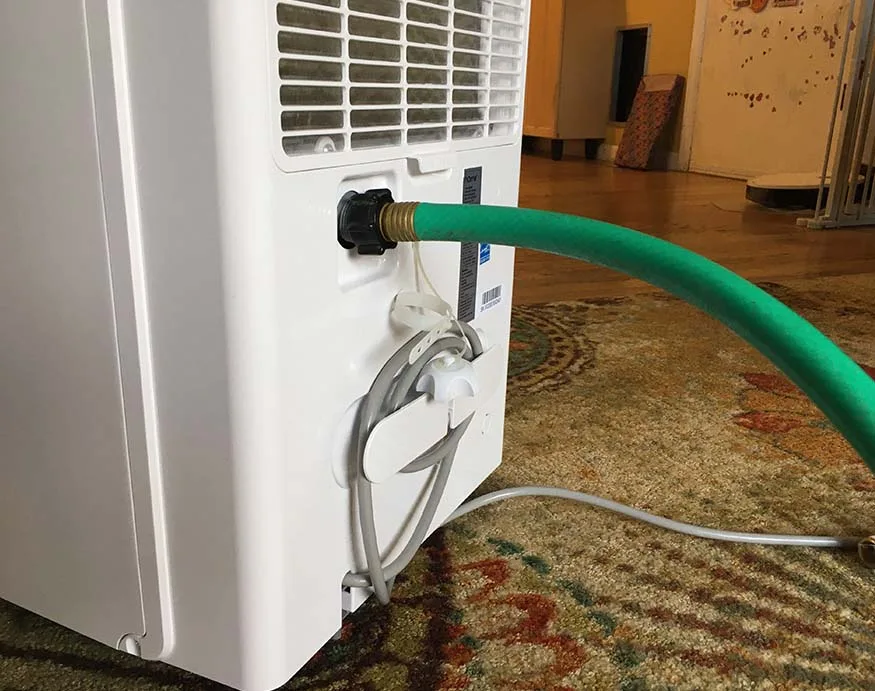
Image source: Bing (Web (fair-use with source credit))
If the hose is clear and the connection is tight but the leak continues, the issue might be inside the drain port itself. Mineral scale from hard water can build up inside the port and restrict flow. Clean the port with a small brush or a pipe cleaner.
If you live in a hard water area, this is worth checking even if the hose looks fine.
Step 3: Look for Internal Leaks and Ice Buildup
If the bucket and the drain hose are both fine, the problem is inside the unit. This is less common, but it happens. The two main internal causes are ice buildup and a damaged drain pan.
Ice buildup on the coils is more common than you might think. Dehumidifiers pull moisture from the air by passing it over cold evaporator coils. If the room temperature drops below 65 degrees Fahrenheit, those coils can frost over. As of 2026, most modern units include an auto-defrost function.
But it does not always catch severe ice buildup. When the ice melts, it creates more water than the drain pan can handle. The excess spills out the bottom.
Check for ice by turning off the unit and opening the front grille. Look at the metal coils. If you see frost or ice, let the unit thaw completely. This can take several hours.
Do not use a hair dryer or scrape the ice off. You can damage the coils. Once thawed, move the unit to a warmer room if possible.
Maintain a room temperature above 65 degrees to prevent recurrence.
The internal drain pan can also fail. The drain pan sits under the coils and directs water to the bucket or drain hose. Over time, the pan can crack or the rubber gasket around it can wear out. If the pan is cracked, you will see water pooling directly under the unit with no obvious cause.
This usually requires a replacement part from the manufacturer. Check your warranty first. Many units have a one to five year warranty that covers the internal drain pan.
If the unit is older than five years and the pan is cracked, it might be time to consider replacing the whole unit. Repair costs can approach half the price of a new machine. For guidance on choosing a reliable replacement, take a look at our recommendations for the best dehumidifier on the market today.
Common Mistakes That Make the Leak Worse
A few well-intentioned fixes can actually make the problem worse. Here are the mistakes we see most often in user reviews and feedback.
Mistake #1: Tilting the unit to drain faster. Some people tilt the dehumidifier forward hoping water will run toward the bucket. This backfires. The unit has a built-in leveling system.
Tilting it can cause the float switch to misread the water level or allow water to bypass the drain pan entirely. Always keep the unit on a level surface. Use the built-in bubble level if your model has one.
Mistake #2: Forcing the bucket in. If the bucket does not slide in easily, something is blocking it. Forcing it can crack the bucket or bend the float switch. Pull the bucket out and check for obstructions.
Look for a stray piece of packaging or a loose item inside the unit.
Mistake #3: Running the unit in cold rooms. Running a dehumidifier in an unheated basement or garage during winter is a recipe for ice buildup. The unit is not designed to operate below 41 degrees Fahrenheit. If you need to dehumidify a cold space, look for a low-temperature model designed for that purpose.
Mistake #4: Ignoring the air filter. A clogged air filter restricts airflow across the coils. This can cause the coils to ice up or the unit to run inefficiently. Clean the filter every two to four weeks during heavy use.
A dirty filter is one of the easiest things to fix and one of the most overlooked.
Mistake #5: Using the wrong size or type of drain hose. Some drain hoses are too narrow for the water flow rate of a high-capacity dehumidifier. Standard drain hose inner diameter is 1/4 inch or 3/8 inch. Check your manual for the correct size.
Using a hose that is too small can cause backups and overflow.
Maintenance Tips to Keep Your Dehumidifier Leak-Free
A little regular maintenance goes a long way. Most leaks we see in aggregate reviews come from neglect rather than manufacturing defects. Here is what to do on a schedule.
Clean the air filter every two to four weeks. A clogged filter restricts airflow. Restricted airflow causes the coils to ice up. Ice buildup leads to overflow and bottom leaks.
Pull the filter out. Rinse it with warm water. Let it dry completely before reinstalling.
This single step prevents a huge number of service calls.
Check the bucket and drain port monthly. Look for cracks, warping, or mineral scale buildup. Hard water leaves white deposits that can clog the drain port. Clean the port with a small brush or a vinegar solution if you see buildup.
Wipe the bucket rim and the rubber gasket where it seals against the unit.
Inspect the drain hose every season. Disconnect it and flush it with warm water. Look for kinks or cracks. Replace it if the plastic feels brittle or shows signs of wear.
A good drain hose costs around five dollars. A ruined floor from a slow leak costs much more.
Keep the unit level. Use the built-in bubble level if your model has one. Adjust the leveling feet as needed. A unit that tilts even slightly can cause water to bypass the drain pan.
Check the level every time you move the unit for cleaning.
Run a self-cleaning cycle if your model has one. Many newer units include a self-cleaning mode that flushes the internal system. Run it once a month during heavy use. This prevents mold and mineral buildup inside the drain pan and hoses.
Frequently Asked Questions
Can a dehumidifier leak even when the bucket is empty?
Yes. The bucket being empty does not rule out a leak. The float switch can stick in the down position, so the unit runs continuously and overflows.
The drain hose can also be clogged even when the bucket is empty. Always check the float and the hose.
Is it safe to run a leaking dehumidifier?
No. Running a leaking dehumidifier creates a shock hazard. Water and electricity do not mix.
Unplug the unit immediately. Find the source of the leak before running it again. If the leak is internal, do not operate the unit until it is repaired.
How do I know if my dehumidifier drain pan is cracked?
Look for water pooling under the center of the unit with no obvious cause. Check the bucket for cracks. Check the drain hose.
If both are fine and the unit is on a level surface, the drain pan is likely cracked. You may need to open the front grille to inspect it.
Why does my dehumidifier leak only when it is humid?
High humidity means the unit works harder. It pulls more water from the air. If the drain system has a minor clog or the bucket is slightly misaligned, the extra water volume pushes it over the edge.
The leak appears only when the unit runs at full capacity.
Does a dehumidifier leak if the room is too cold?
Yes. Cold temperatures cause the coils to frost over. When the frost melts, the water volume can exceed what the drain pan handles.
Most units stop working effectively below 65 degrees Fahrenheit. Do not run a standard dehumidifier in an unheated space.
When should I replace my dehumidifier instead of repairing it?
Replace it if the internal drain pan is cracked and the unit is over five years old. Replacement parts plus labor often cost half the price of a new unit. Also replace it if the compressor fails or the unit repeatedly leaks after repairs.
A new Energy Star model will be more efficient.